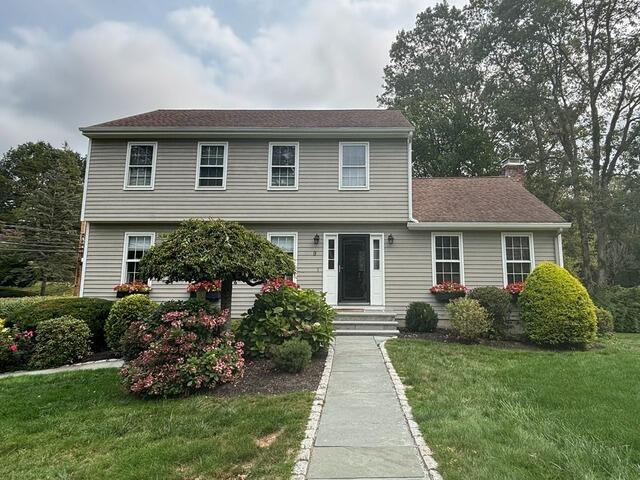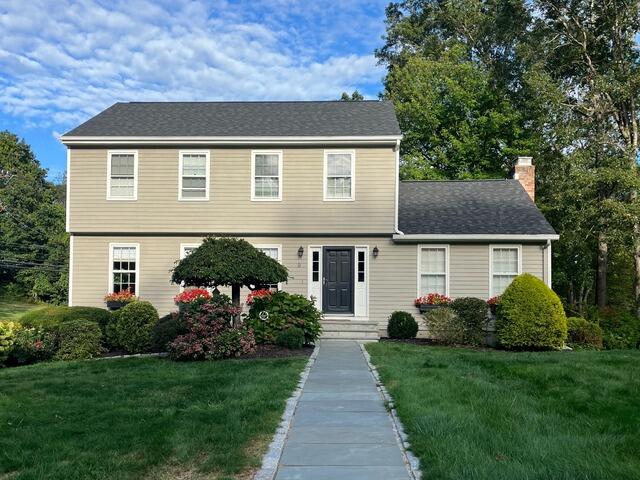
Brown Roofing Company, Inc. Before & After Photos
Click on a photo to enlarge.
Trumbull, CT Amazing Roof Replacement
This homeowner worked with Inspector Coleton and Project Manager William to choose IKO Dynasty AR Shingles in Granite Black.
Brown Won't Let You Down!
Trumbull, CT Beautiful Roof Replacement
This homeowner worked with Inspector Darwin and Project Manager William to choose IKO Dynasty AR Class 3 Shingles in Summit Gray.
Brown Won't Let You Down!
Trumbull, CT Amazing Roof Replacement
This homeowner worked with Inspector Darwin and Project Manager Austin to choose IKO Dynasty AR Shingles in Shadow Brown.
Brown Won't Let You Down!
Trumbull, CT Amazing Roof Replacement
This homeowner teamed up with Inspector Coleton and Project Manager Austin to upgrade their home with long-lasting, impact-resistant IKO Dynasty AR Shingles in the bold and elegant Granite Black color. The result? A stronger, more stylish roof built to withstand the elements.
Brown Won’t Let You Down!
From 27 Years Old to Built-to-Last for 50: Roof Replacement in Trumbull, CT
Trumbull homeowner John contacted Brown Roofing knowing his 27-year-old roof had reached the end of its lifespan. Inspector Austin performed a detailed examination, walked John through our process and materials, and gave him the confidence to move forward with us. Project Manager Geury and his skilled crew removed the old shingles, replaced damaged sections of plywood sheathing, and installed ice and water shield plus synthetic underlayment for lasting protection. The roof was then finished with IKO Dynasty shingles in John’s choice of sleek Granite Black, all backed by our 50-year warranty. With the final touches complete, John’s home now has a roof that not only looks beautiful but also delivers long-term strength, style, and peace of mind. Brown Won't Let You Down!
Our Service Area
Proudly Serving Connecticut
We serve the following areas
- Ansonia
- Bantam
- Barkhamsted
- Beacon Falls
- Bethany
- Bethel
- Bethlehem
- Botsford
- Bridgeport
- Bridgewater
- Brookfield
- Canaan
- Cheshire
- Colebrook
- Cornwall
- Cornwall Bridge
- Cos Cob
- Danbury
- Darien
- Derby
- East Canaan
- East Haven
- Easton
- Fairfield
- Falls Village
- Gaylordsville
- Georgetown
- Goshen
- Greens Farms
- Greenwich
- Hamden
- Harwinton
- Hawleyville
- Kent
- Lakeside
- Lakeville
- Litchfield
- Middlebury
- Milford
- Monroe
- Morris
- Naugatuck
- New Canaan
- New Fairfield
- New Hartford
- New Haven
- New Milford
- New Preston Marble Dale
- Newtown
- Norfolk
- North Haven
- Northfield
- Norwalk
- Oakville
- Old Greenwich
- Orange
- Oxford
- Pequabuck
- Pine Meadow
- Plymouth
- Prospect
- Redding
- Redding Center
- Redding Ridge
- Ridgefield
- Riverside
- Riverton
- Roxbury
- Salisbury
- Sandy Hook
- Seymour
- Sharon
- Shelton
- Sherman
- South Britain
- South Kent
- Southbury
- Southport
- Stamford
- Stevenson
- Stratford
- Taconic
- Terryville
- Thomaston
- Torrington
- Trumbull
- Washington
- Washington Depot
- Waterbury
- Watertown
- West Cornwall
- West Haven
- Weston
- Westport
- Wilton
- Winchester Center
- Winsted
- Wolcott
- Woodbridge
- Woodbury


.png)
