
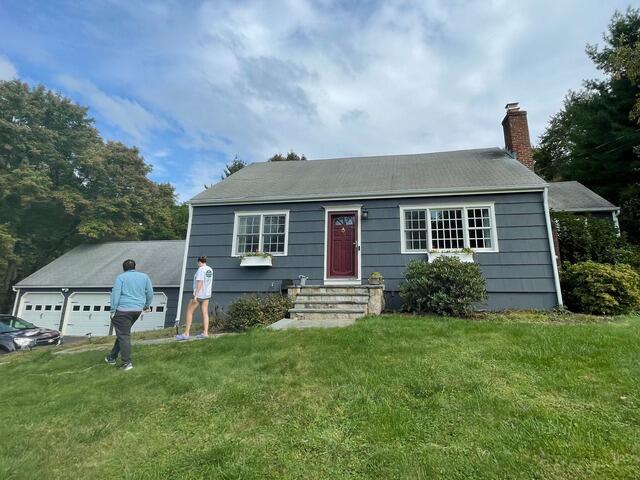
Before: Front View
Here's a gander at Dan's roof from the front before the replacement. Click through to see the transformation!
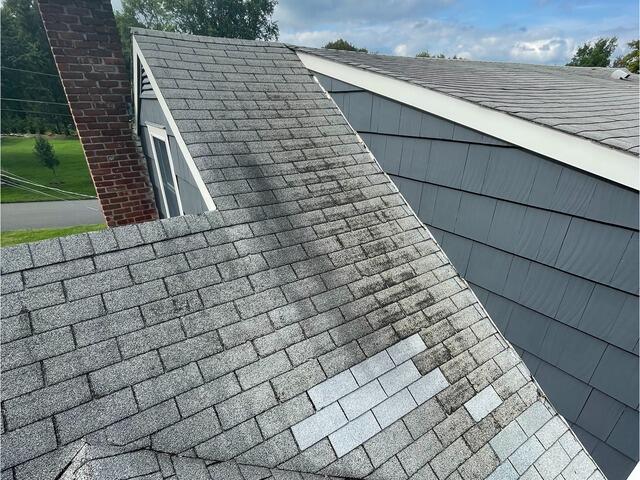
Before: Algae & Mismatched Shingles
This closer look at Dan's roof shows dark streaks of algae growth as well as some mismatched shingles from previous leak repairs. Time to stop those leaks for good and get this brand-new roof on!
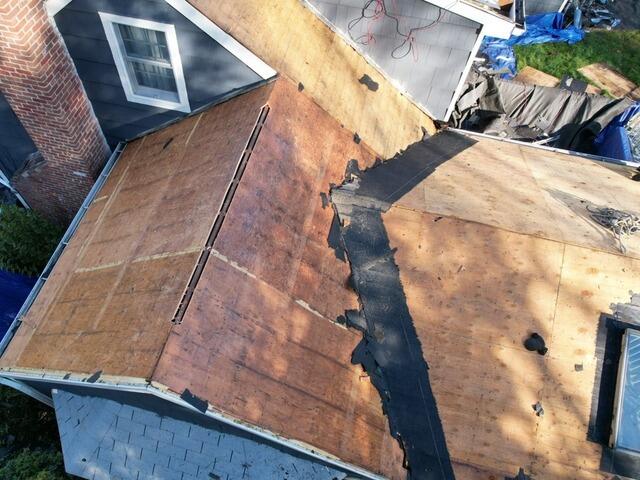
Old Shingles Are Removed
The first step of the process is to remove the old shingles. This reveals the plywood foundation underneath, which is called the roof decking.
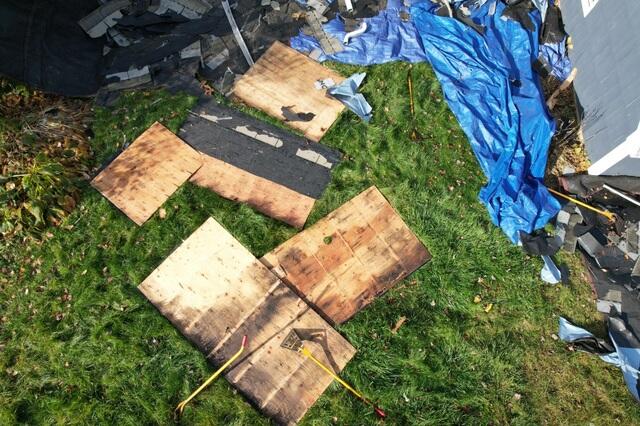
Bad Plywood Is Removed
As the structural foundation of the roof, it's crucial that the decking is in tip-top shape. Any parts found with damage, like rot or mold, are removed - like these pieces here.
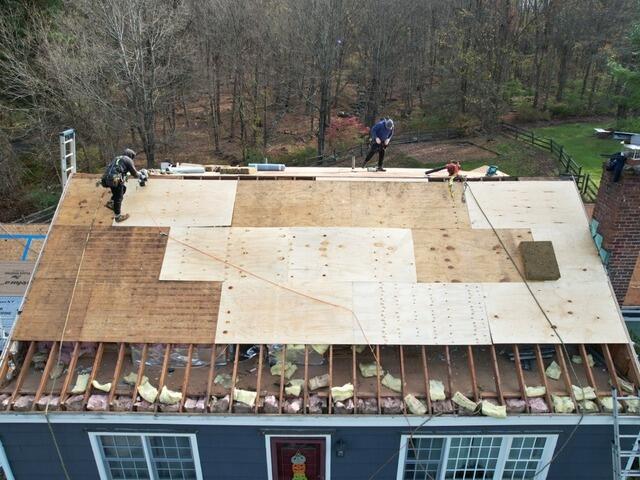
New Plywood Is Installed
Brand-new sturdy plywood replaces the damaged plywood. The crew carefully and precisely cuts, fits, and nails each new sheet into place.
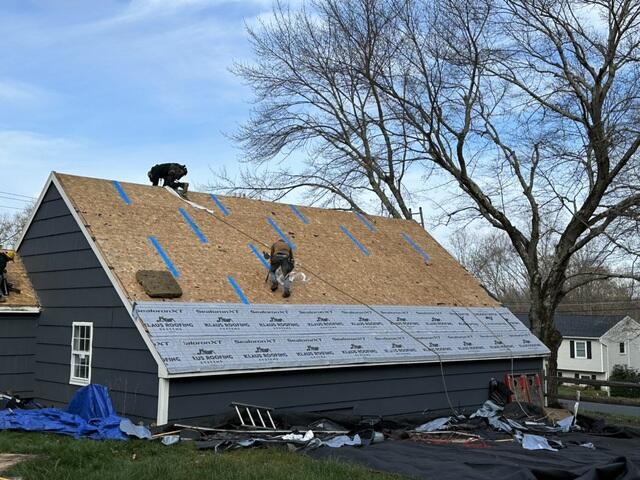
Seams Are Taped & Underlayment Is Applied
As an added measure of reinforcement, the seams of each sheet of plywood are taped up with all-weather Sealoron XT deck tape. Next, a layer of underlayment is applied to the entire surface. This thin, water-resistant material protects the decking from harsh elements like wind, rain, and ice.
Rake & Drip Edge Installed
Rake and drip edge are installed to the edges of the roof. This metal flashing prevents water from seeping in from the sides of the roof, and it is also reinforced with deck tape.
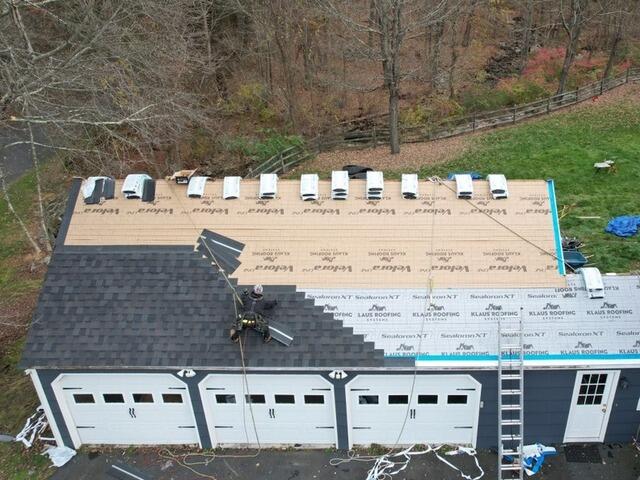
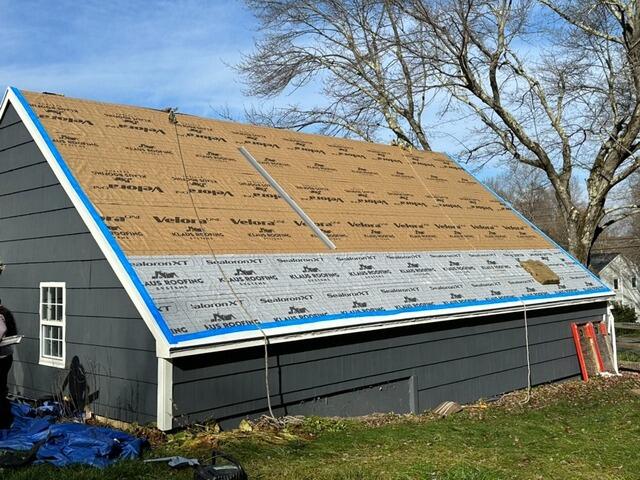
New Shingles Go On
Once the underlayment, rake, and drip edge are all securely in place, it's time to start installed the new IKO Dynasty shingles. These premium-quality shingles are as durable as they are beautiful, and come in a variety of colors. Dan has selected the cool and sophisticated Glacier shade for his new roof.
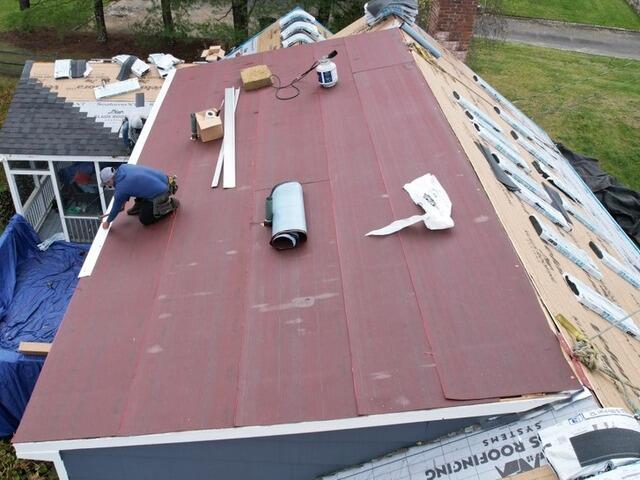
SBS Base Is Installed
This section of Dan's house is low-sloping, meaning its angle is too gentle for shingles to be installed. Instead, an SBS (styrene-butadiene-styrene) membrane is applied. The bottom layer is called the "base," and it acts just like underlayment.
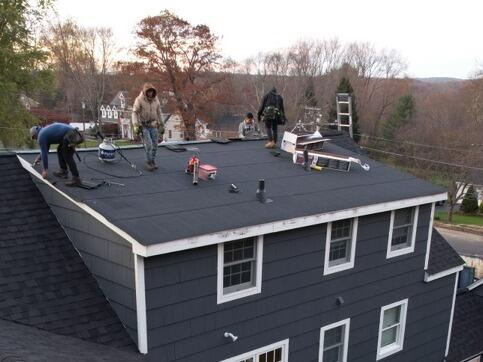
SBS Cap Is Installed
The top layer of the SBS, called the "cap," is carefully installed over the base, and now the low-sloping roof section is complete.
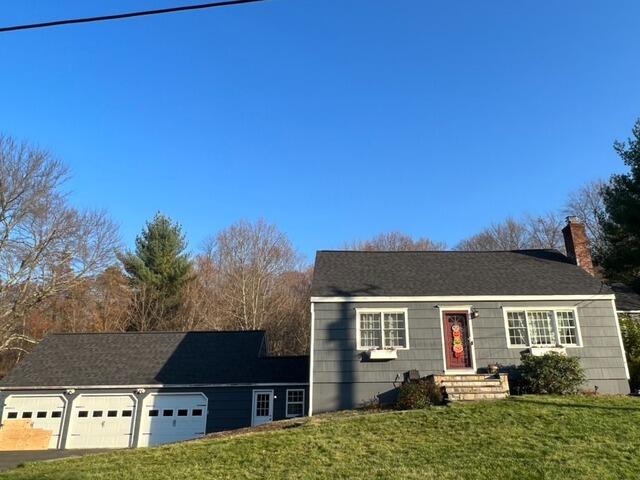
After: Front View
After a few final touches, like securing flashing around pipes and the chimney as well as installing a ridge vent to ensure proper air circulation throughout the attic - Dan's new roof is complete!