
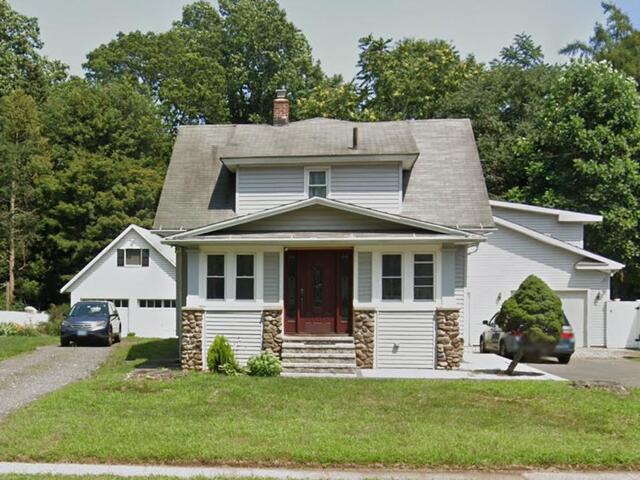
The Roof Before
Here's a look at Dee and Dez's house before the roof replacement. Click through to see the fantastic transformation!
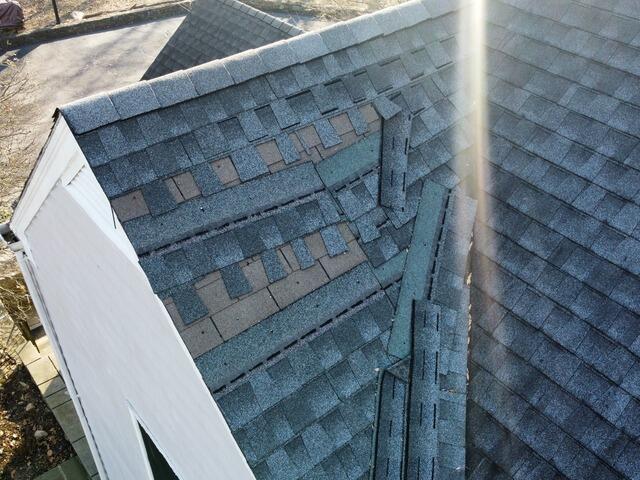
Before: Fallen Shingles
This closer look at Dee and Dez's house shows shingles fallen out of place. Harsh weather along with inadequate installation techniques can lead to this happening. Let's get this fixed up!
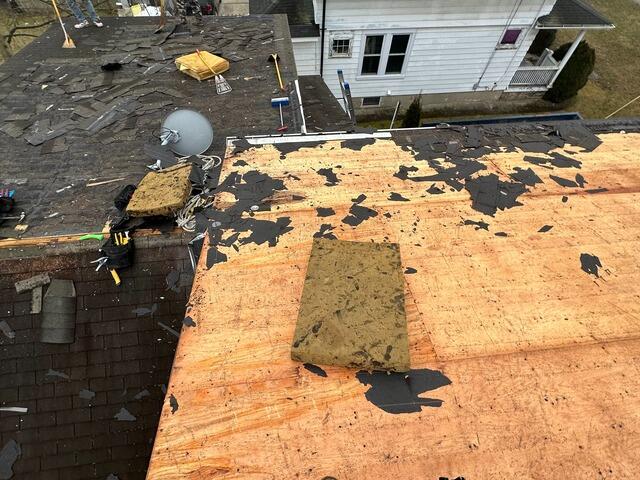
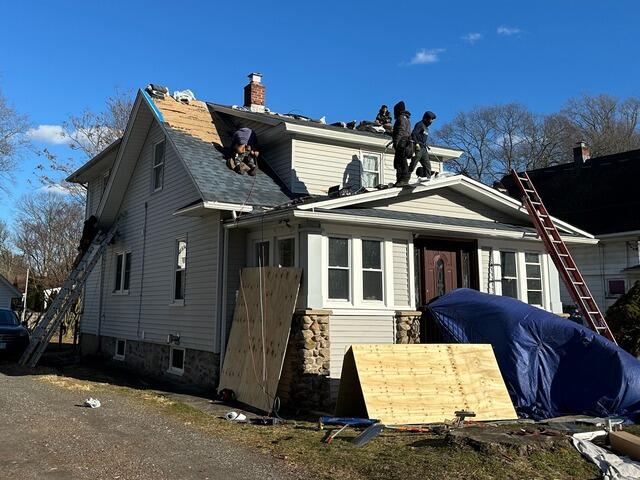
Old Shingles Are Stripped
The crew kicks things off by carefully tearing off the old shingles of the roof. This reveals the layer of plywood underneath, which is known as the roof decking.
Bad Decking Is Removed
As the structural framework of the roof, the health of the decking is essential. Any parts of the decking found to have damage such as rot or mold are removed and replaced with brand-new sturdy plywood.
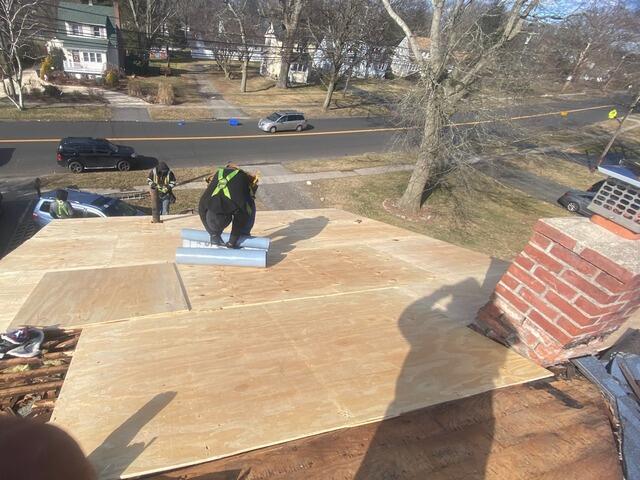
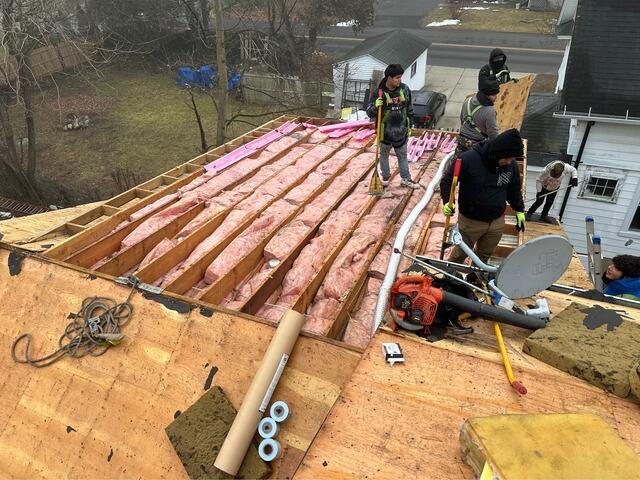
New Plywood Is Installed
Each new sheet of CDX plywood is precisely measured and fitted into place and securely nailed into the rafters.
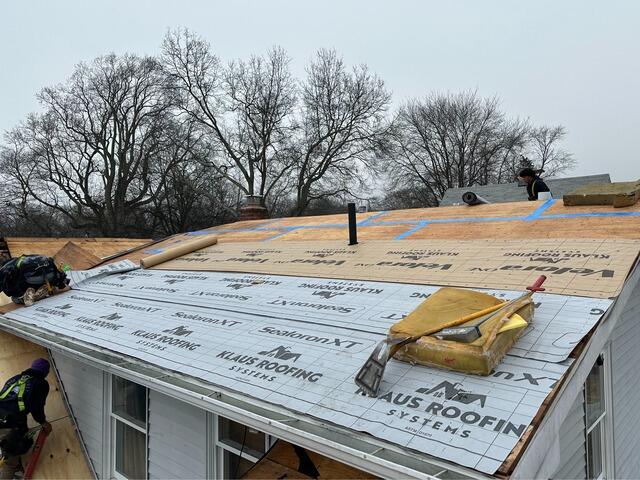
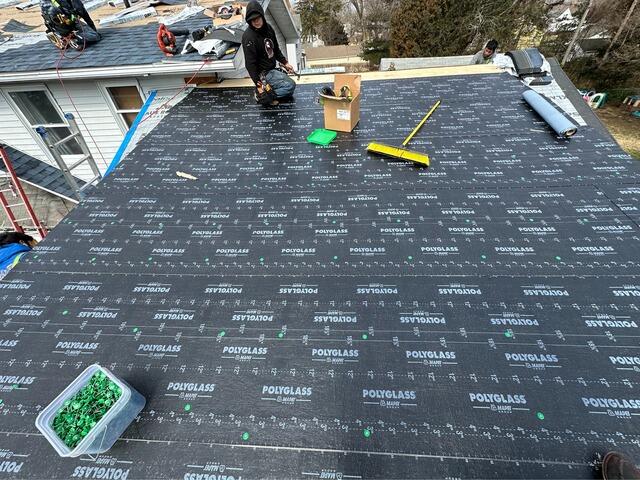
Seams Taped & Underlayment Applied
The seams of each plywood sheet are taped with strong all-weather deck tape. After that, a layer of underlayment is installed over the entire surface. This thin material keeps the decking water-resistant by shielding it from extreme elements such as rain, snow, and ice.
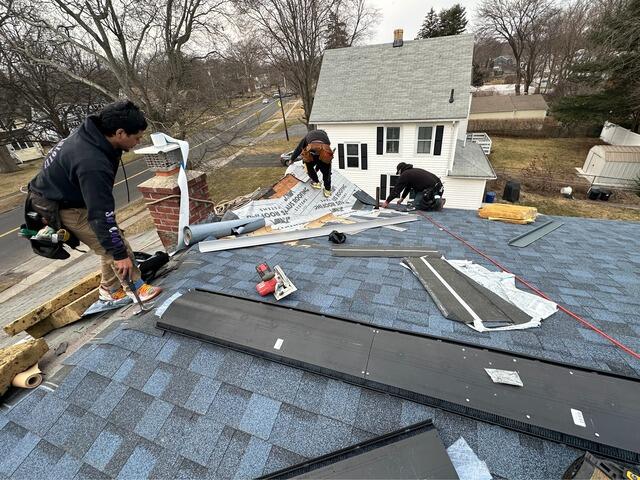
New Shingles Are Installed
With the underlayment in place, it's time to start installing the brand-new IKO Dynasty shingles. These premium-laminated shingles are renowned for their superior quality and stunning curb appeal. Dee and Dez have selected the beautiful shade of Atlantic Blue for their new roof.
SBS Roof Section Is Installed
This section of Dee and Dez's roof is considered low-sloping, meaning that its pitch is too gentle to have shingles installed. Instead, a specialized SBS (styrene-butadiene-styrene) roofing system is installed. This synthetic rubber membrane consists of two parts. The first layer, known as the "base," is similar to the underlayment that is applied to the other sections of the roof.
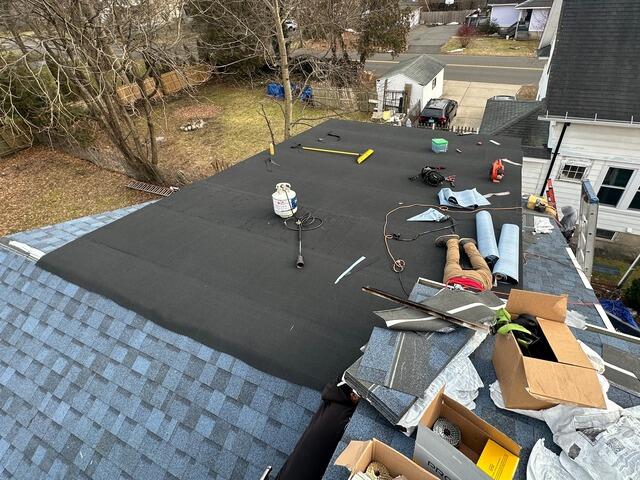
SBS Roof Is Finished
The top layer of the SBS roof, known as the "cap," is installed over the base, carefully smoothed out and secured with a torch, completing this section of the roof.
Ridge Vent Is Installed
After all of the shingles are in place, a vent is installed along the ridges of the roof. This ridge vent ensures proper air circulation by allowing hot, humid air rising from inside of the house a means to escape, eliminating damaging condensation buildup.
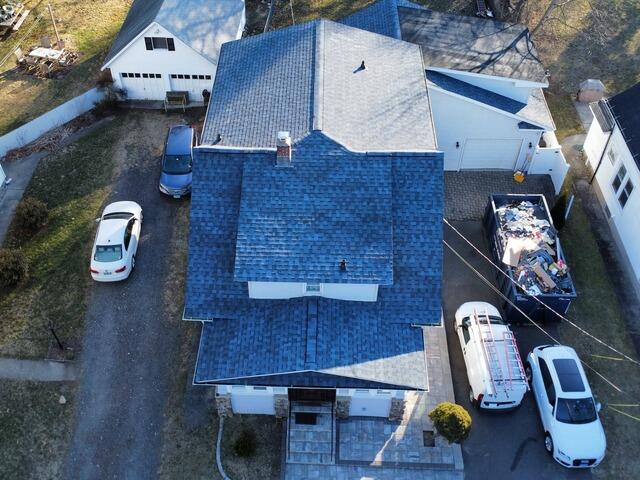
The Roof After
After a couple of final touches such as securing the ridge vents with ridge caps for a seamless look and installing flashing around the chimney and all pipes, the new roof is complete!