
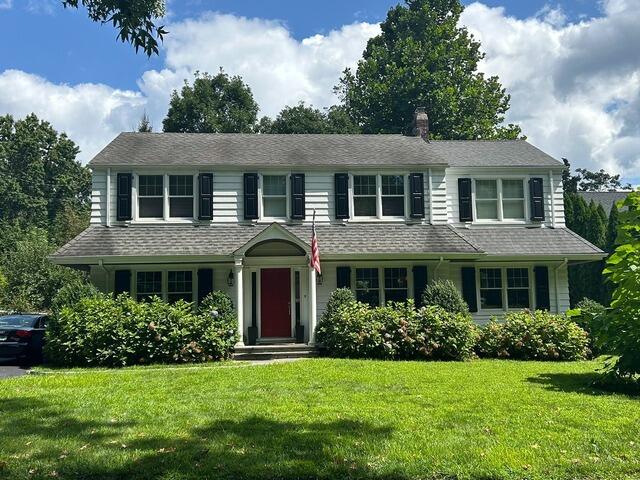
Before: In-stain-ity
In this before image of Doug's house, the discoloration of his shingles is pretty noticeable - even from a distance. Click through to see the spectacular transformation!
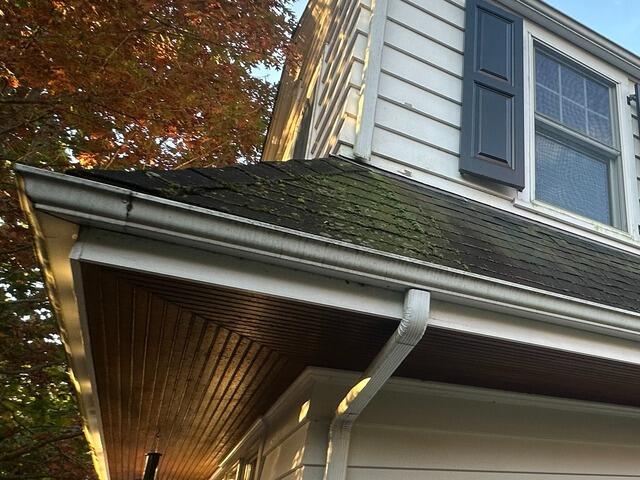
Before: Mossy
In addition, moss had taken to growing between the shingles where the roof got the most shade from nearby trees. This meant that damaging moisture was accumulating. Time for a new roof!
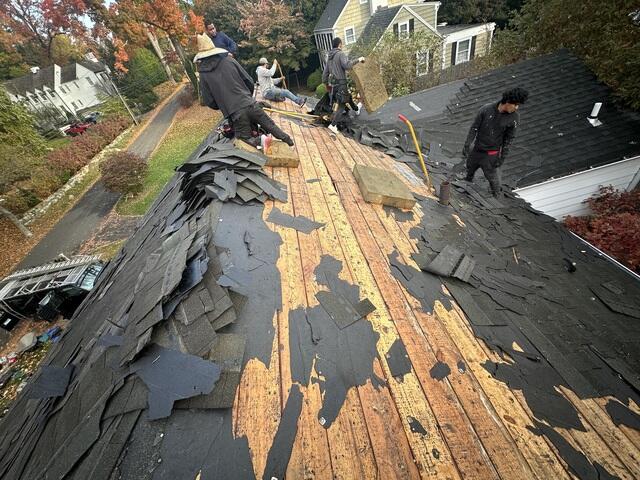
Stripping Off the Old Shingles
The crew starts the job by removing the old shingles. This exposes the layer of plywood underneath, which is called the roof decking. Our experts closely inspect the decking for any signs of rot, damage, decay, or mold.

Underlayment Applied
Any compromised pieces of decking are replaced, ensuring a solid foundation. Once the decking is secure, the crew applies the underlayment - a thin, water-resistant synthetic felt that covers the entire surface. This layer protects the decking from damaging elements like rain, snow, and ice.
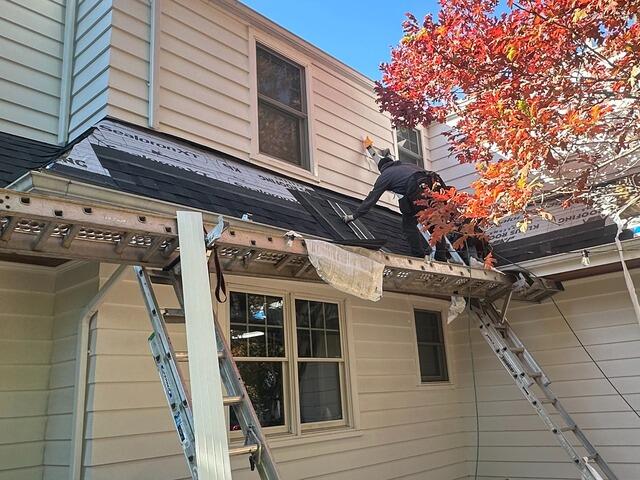
Shingles Installed
Once the underlayment is fully in place, the crew begins installing the brand-new IKO Dynasty premium-laminated shingles. Doug chose Granite Black for his roof's new color, which happens to be one of our most popular selections!
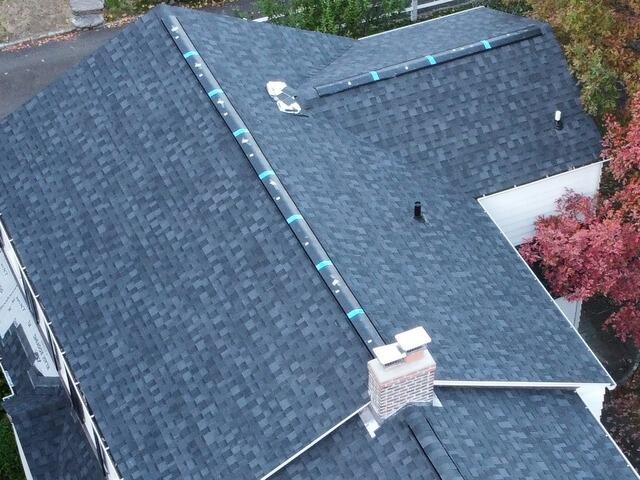
Ridge Vent Installed
The crew installs a ridge vent at the highest point of the roof. This ridge vent allows warm, moist air that rises from the house to freely escape, minimizing the chances of damaging condensation buildup.
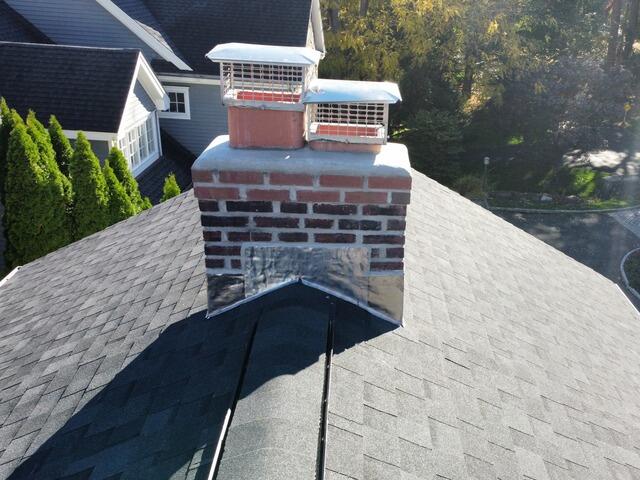
Chimney Flashing Installed
Doug's chimney, beautifully rebuilt by our expert masons, gets flashing installed around the edges. This thin material (shown here in lead) prevents water from seeping into joints and other vulnerable areas, keeping the roof secure and dry.
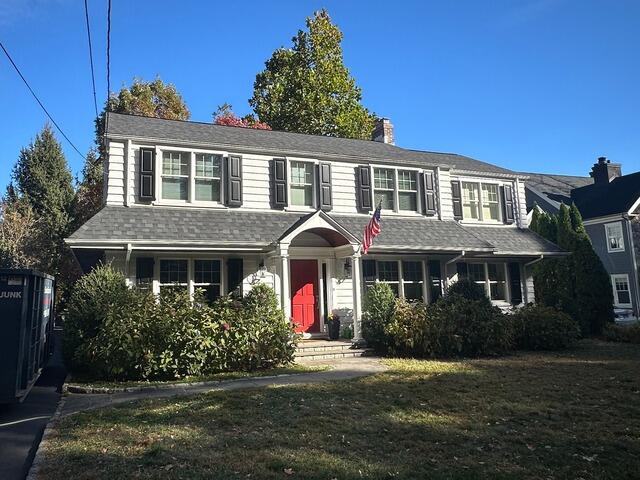
The Finished Look
With shingles installed over the ridge vent, flashing added around the vents, and a few final touches, this new roof is complete - looking amazing and ready to protect for years to come!