
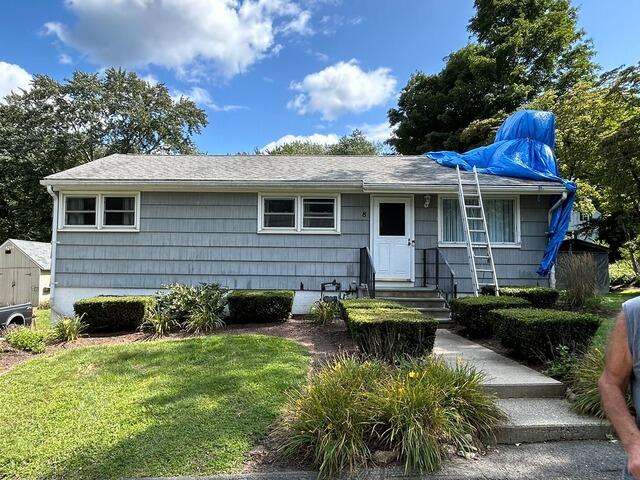
Before: Terrible Tarp
Louis's old roof rocked a trusty tarp to fight off leaks. Something really needed to be done about that. Click through to see the incredible transformation!
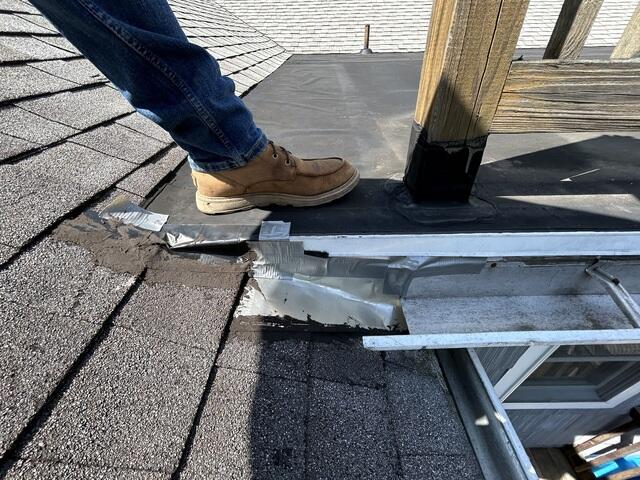
Before: DIY Solutions
Is that... duct tape? Well, that's one way to stop a leak - but not the best, and definitely not the most beautiful. Don't worry, we've got this covered!
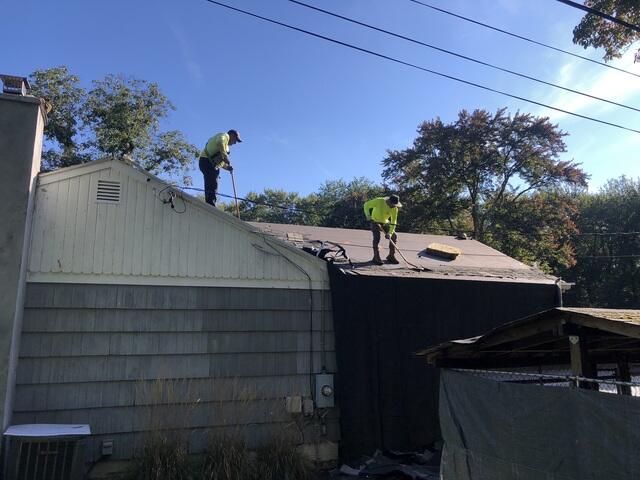
Removing the Old Shingles
The roof renovation begins by removing the old shingles. Underneath the shingles is a layer of plywood called the roof decking, and it is the structural framework of the roof.
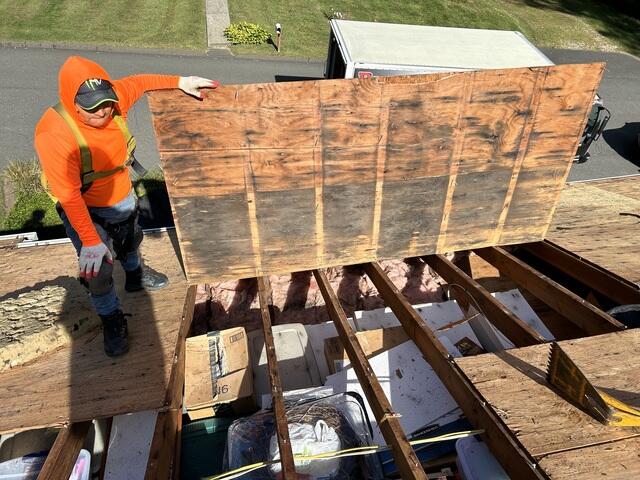
The Decking Is Inspected
After stripping off the shingles, our crew thoroughly inspects the decking for any signs of rot or mold. This sheet didn't pass the test. It, along with any other affected pieces, is replaced with fresh plywood to ensure a solid, healthy base for the new roof.
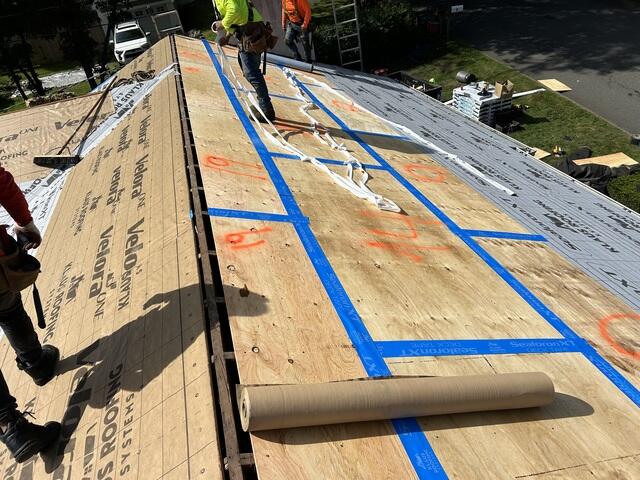
Seams Taped & Underlayment Applied
With the new decking nailed into place, the crew reinforces every seam with heavy-duty deck tape. Next comes the underlayment: a water-resistant barrier that shields the decking from rain, snow, and ice.
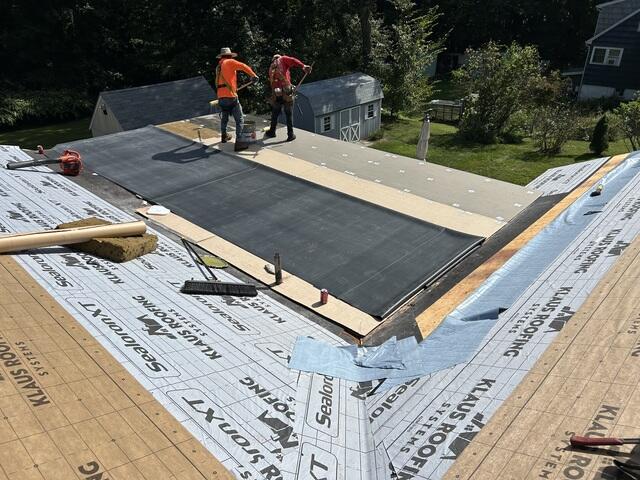
Low-Sloping Roof
This section of Louis's roof had a low slope. In accordance with current building codes, shingles cannot be installed here - instead, a specialized synthetic rubber membrane is installed.
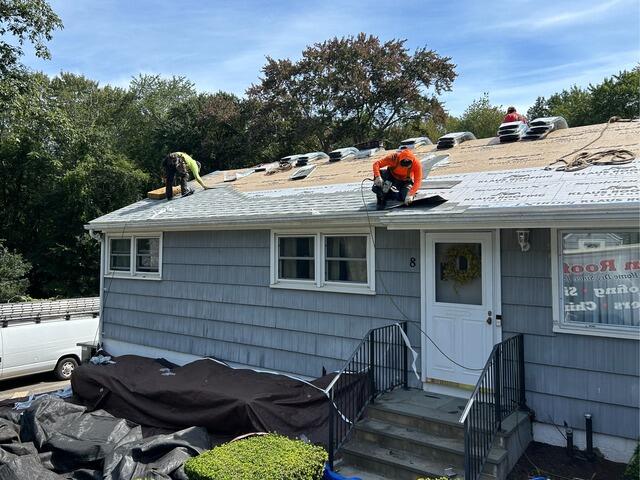
New Shingles Are Installed
After the decking is completely covered in underlayment, the crew gets to work installing the new shingles. The shingles we trust for every roof are superior quality IKO Dynasty premium-laminated. Louis has selected the beautiful color of Frostone Gray for his roof.
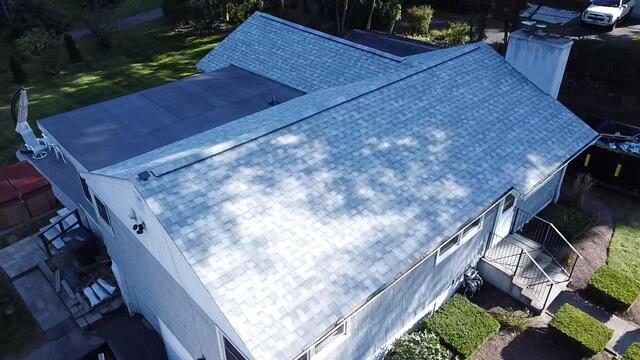
After: Aerial View
A ridge vent is installed at the peaks of the roof to ensure proper air circulation, and after a couple of other final touches, the new roof is complete!
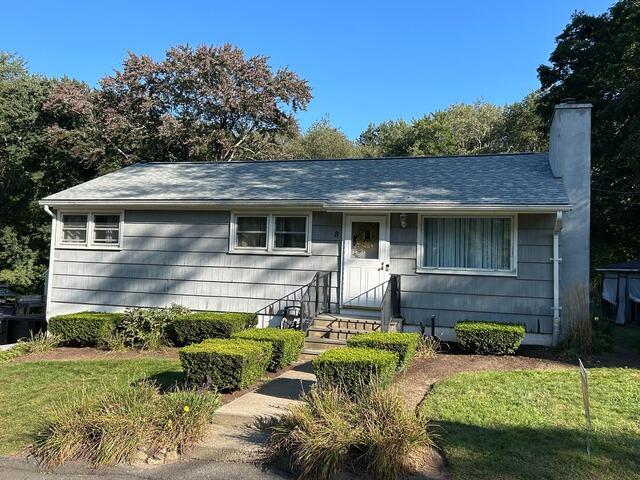
After: Tarp-B-Gone
No more tarp needed! Louis's roof will keep him safe and dry for years to come - and it looks great, too!