
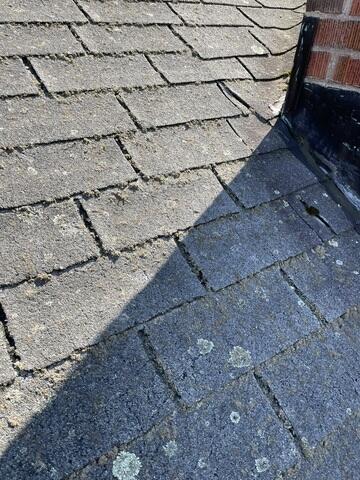
Before: Lichen & Moss Overload
If your roof looks like this, it's time for a replacement! With significant moss and lichen growth, these shingles are badly deteriorated and are holding on for dear life.
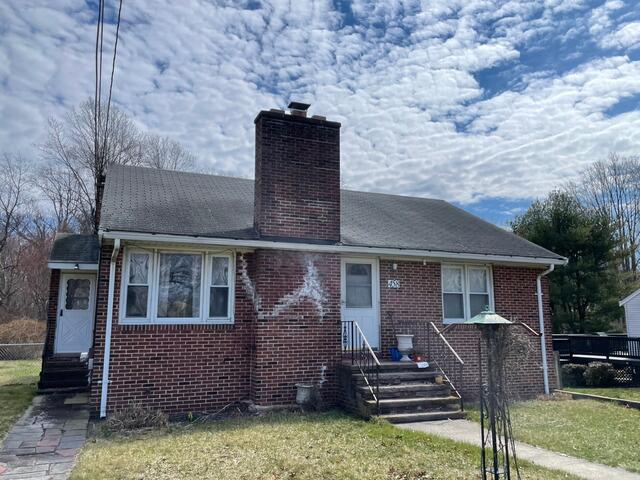
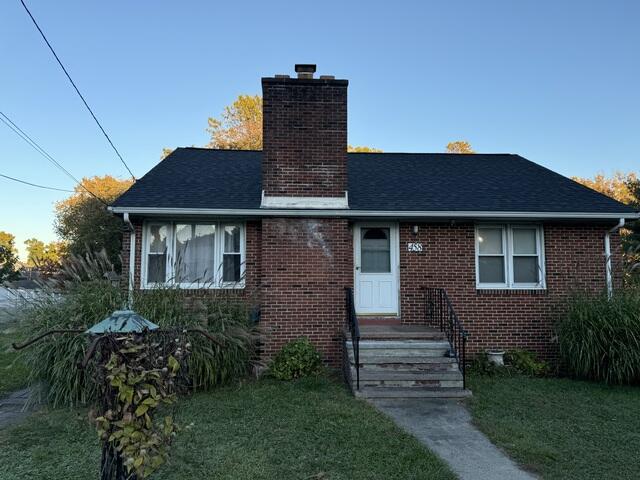
Before: Front View
From the front, the discoloration is noticeable, and the chimney's flashing could use some attention. Don't worry, we've got that covered.
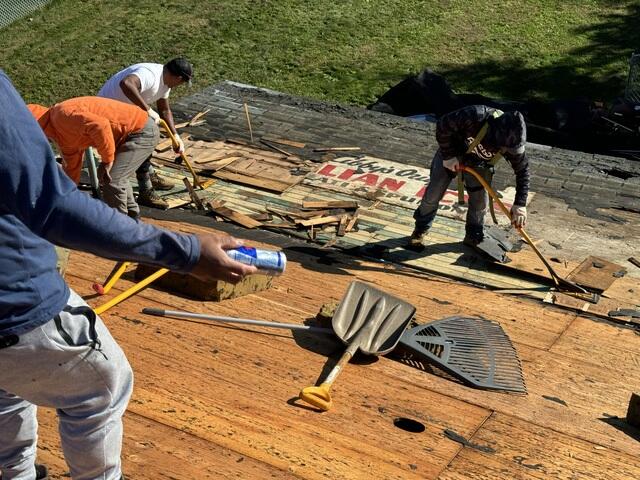
Removing the Old Shingles
The first step is to remove the old shingles, which in this case, consisted of two layers. While layering shingles is sometimes done to avoid a full replacement, it often just hides underlying issues and adds unnecessary weight to the roof.
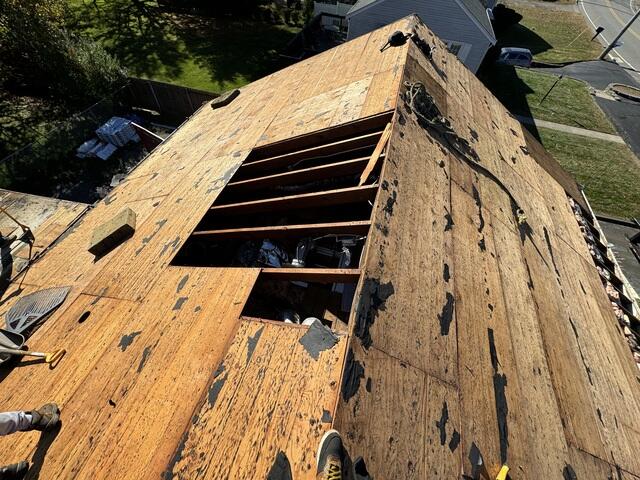
Bad Plywood Is Removed
Once the shingles are fully removed, the plywood foundation is exposed. The crew inspects the plywood for any signs of rot or mold, and they remove any damaged sections.
New Cricket, Who's This?
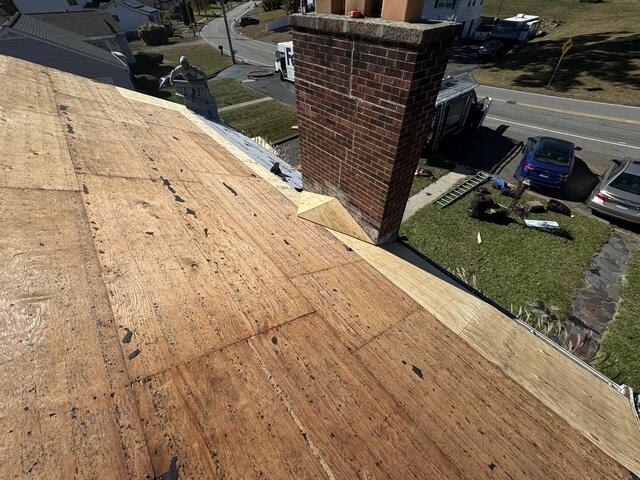
New plywood is precisely cut and installed to fit the roof, including the addition of a cricket: a small, triangular extension designed to redirect water away from the chimney and down the roof.
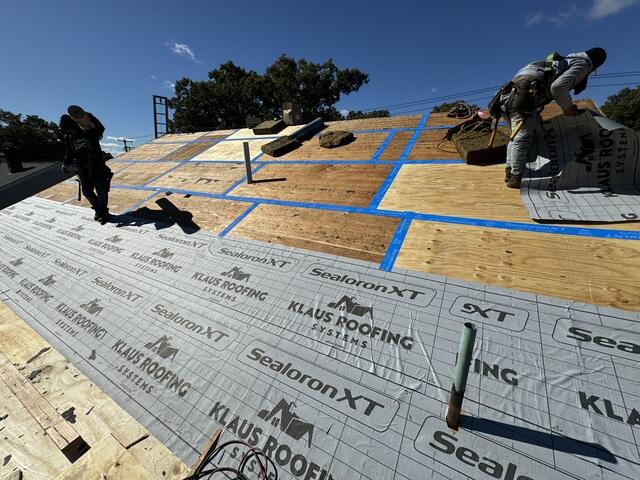
Taped Up & Underlayment Laid
Once the new plywood is in place, the seams of each sheet are reinforced with heavy-duty deck tape. Next, a layer of underlayment is applied to the entire plywood foundation, ensuring protect against rain, snow, and ice.
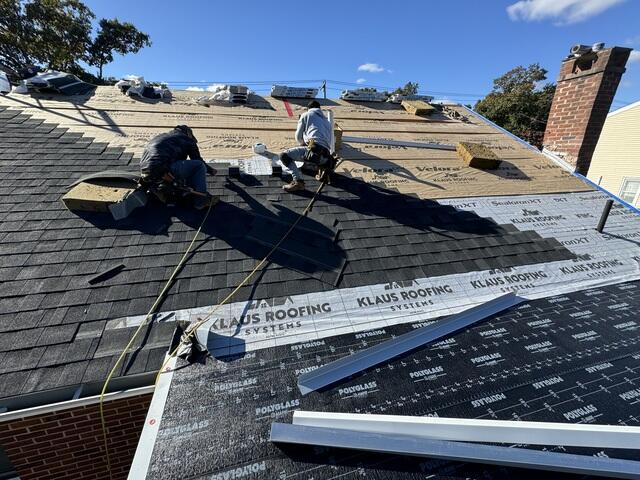
New Shingles Are Installed
Now, it's time to install the new shingles. We're using our premium-laminated IKO Dynasty shingles, known for their durability and single-layer strength. Kay has selected our most popular color, Granite Black.
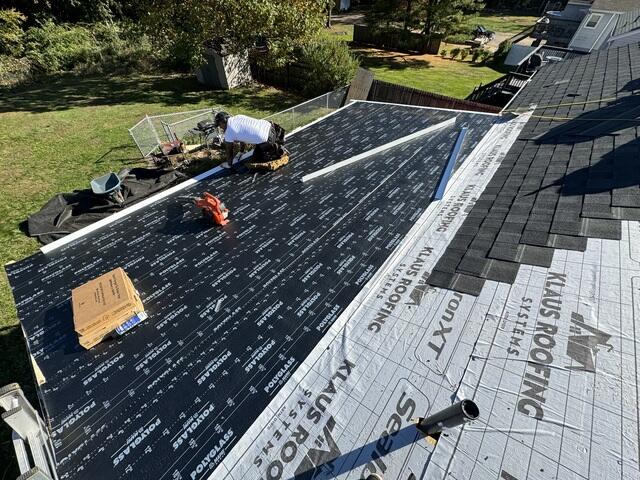
Low-Sloping Roof Base Installed
This part of the roof is considered low-sloping, and according to current building codes, asphalt shingles can't be used here. Instead, a polyester membrane must be installed. We're using Polyglass Elastoflex, and the first layer applied is called the base.
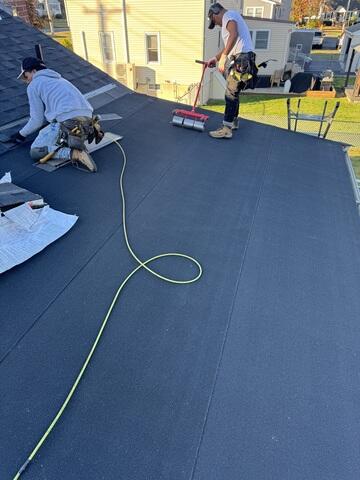
Low-Sloping Roof Cap Installed
The top layer of the low-sloping roof is called the cap. It's carefully rolled out and precisely flattened to fit snugly, ensuring a tight and seamless installation.

Ridge Vent Installed
Once all the shingles are installed, the ridge vent is placed at the roof's peak. This allows for proper air circulation, enabling hot, humid air to escape and preventing moisture buildup inside the roof.
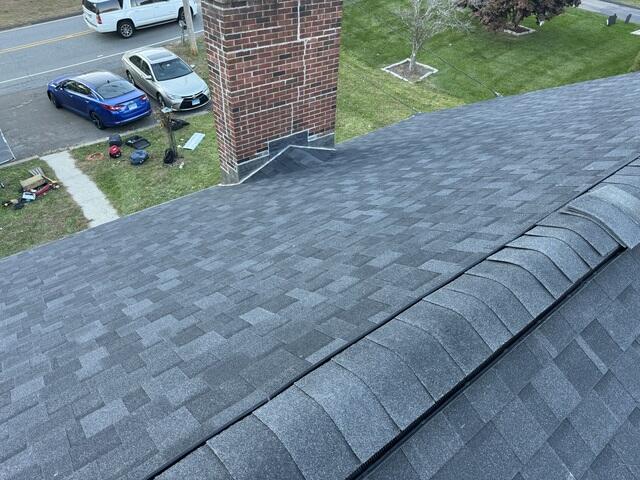
Slick Cricket & Sleek Vent
Once the vent is fully in place, matching ridge shingles are added on top to complete the look. The cricket is also finished with shingles and durable lead flashing to prevent water from seeping through any crevices.
This Roof Is Done
With the flashing expertly completed around the chimney, the roof is now fully finished and looks fantastic!