
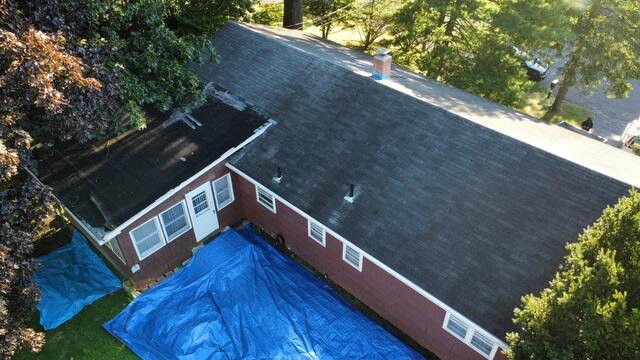
Roof Before: Discoloration & Peeling
The old roof had significantly deteriorated, with shingles heavily worn down by years of exposure to the elements, leading to noticeable discoloration. Additionally, the flat roof was peeling at the edges and had numerous patches in desperate need of repair.
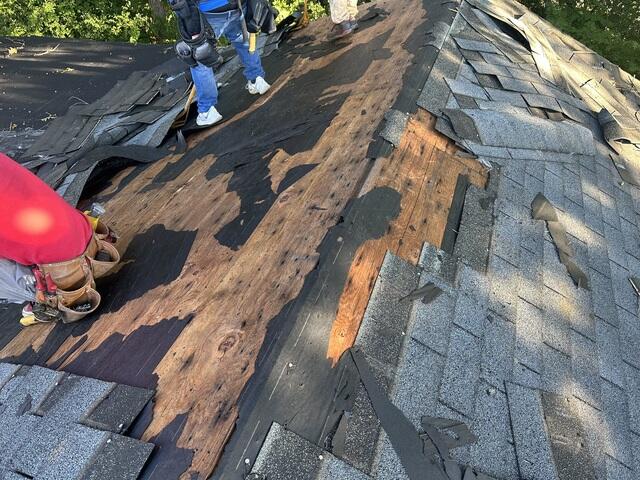
Old Shingles Are Removed
The crew starts dismantling the old roof by stripping away the worn shingles, revealing the plywood beneath. This layer of plywood is known as the roof decking, and it serves as the structural foundation of the roof. After the shingles are removed, the crew examines the decking for any signs of rot, decay, or mold.

The Decking Is Replaced
Our crew assessed the roof and found that the decking was severely compromised by water damage and mold, requiring a full replacement. With Catherine's approval, they removed all the rotted plywood and began installing brand-new, sturdy sheets to restore the roof's integrity.
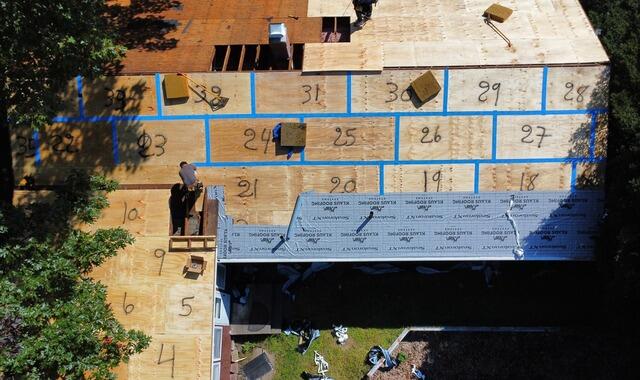
Seams Are Taped & Underlayment Is Applied
Once the decking is fully installed, the seams between the plywood sheets are securely taped with SealoronXT deck tape. Next, a layer of underlayment is applied across the entire surface. This thin, protective barrier ensures the decking remains resistant to water damage from rain, snow, and ice.
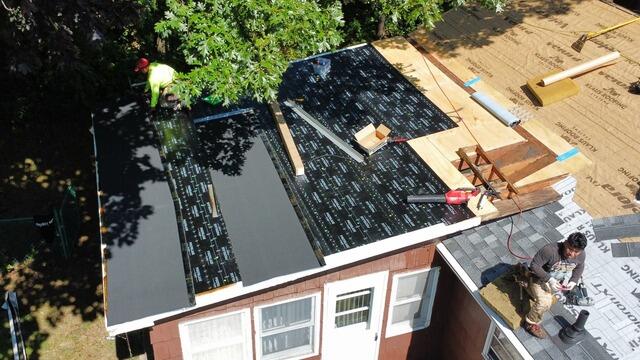
Flat Roof Base & Cap Applied
As work on the shingled roof progresses, the flat roof is also taking shape. A specialized underlayment, Polyglass Elastoflex Base, is applied to the surface, followed by a protective layer of Polyglass Elastoflex Cap for added durability and weather resistance.

Shingles Are Installed
The crew begins installing premium-quality IKO Dynasty shingles in the elegant Summit Gray color.
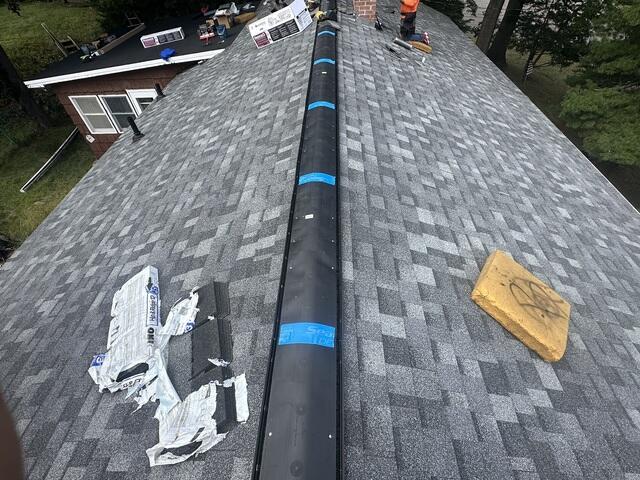
Ridge Vent Is Installed
Once all the shingles are in place, a ridge vent is installed along the roof's peak. This vent promotes airflow, allowing humid air to escape from the house and preventing moisture buildup.
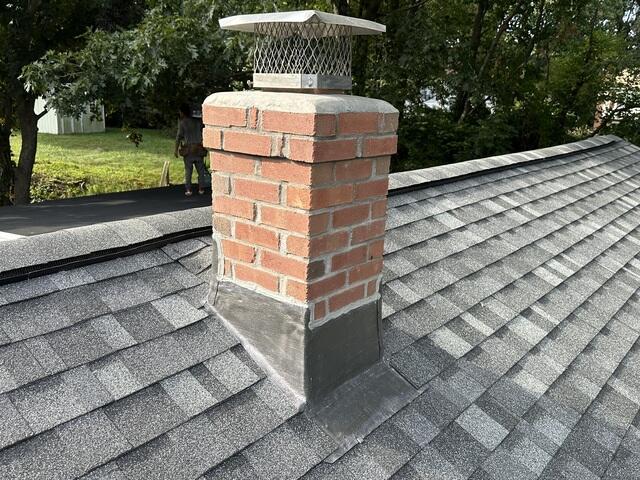
Chimney Flashing
Flashing is installed around the chimney to create a waterproof seal, preventing water from seeping into roof joints and crevices. Homeowners have a couple of material options for flashing, and in this case, lead flashing was chosen for its durability and effectiveness.
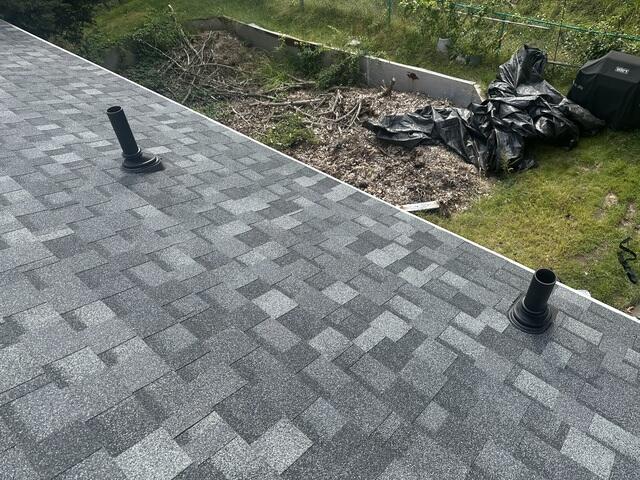
Pipe Vents Flashing
Flashing is installed on the roof's pipe vents using the Perma-Boot, a robust, heavy-duty plastic covering.
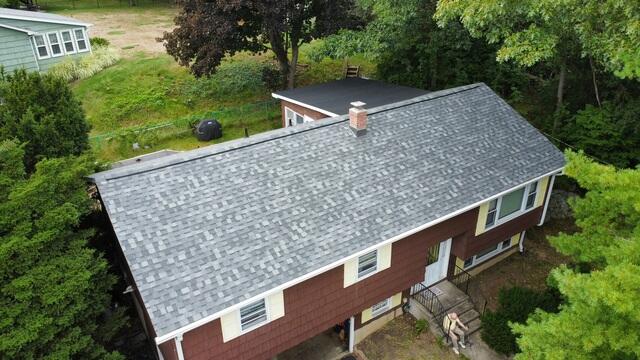
The Finished Roof
The roof is now complete! With new decking, premium shingles, and a reinforced flat section, this roof is built to endure the elements for many years ahead.