
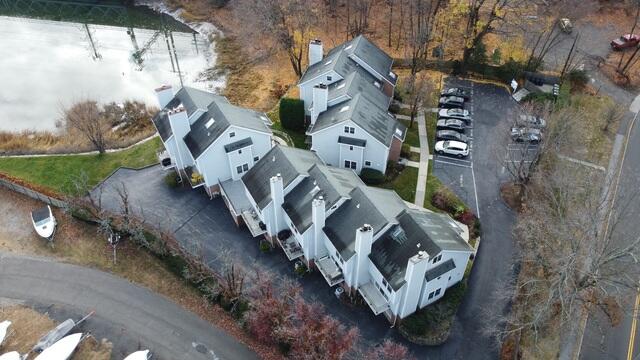
Aerial View: Before Roof Replacement
The townhouse complex consisted of 10 roofs for 10 separate units due for replacement. Each roof showed signs of weathering, discoloration, and loose shingles.

Close-Up of Old Skylight
In addition, this complex contained 17 dome skylights, all of which were to be replaced with a more modern flat style. Many of them appeared similar to this one, showing wear and breakage around the edges.
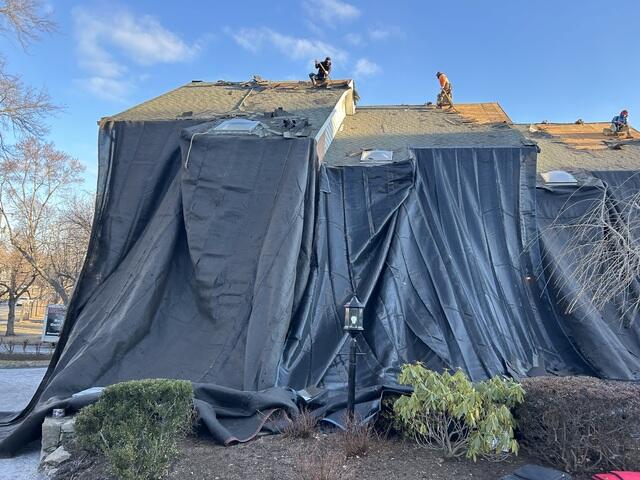
The Teardown Begins
The crew begins the replacement process by first tearing off the old shingles. Tarps are hung from each roof to ensure that each homeowner's property is completely protected.
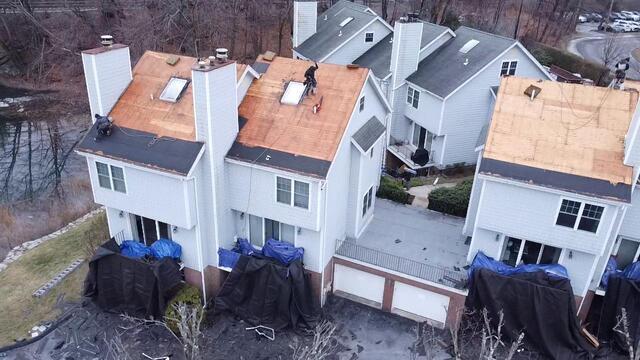
Shingle Removal Continues
After all the shingles have been removed, the plywood underneath is revealed and examined for damage or decay.
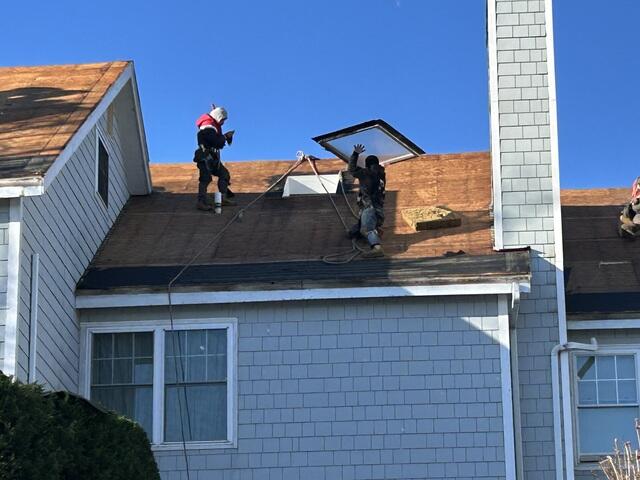
Old Skylights Are Removed
Next, the crew takes off the old skylights and replaces them with our high-quality VELUX skylights.
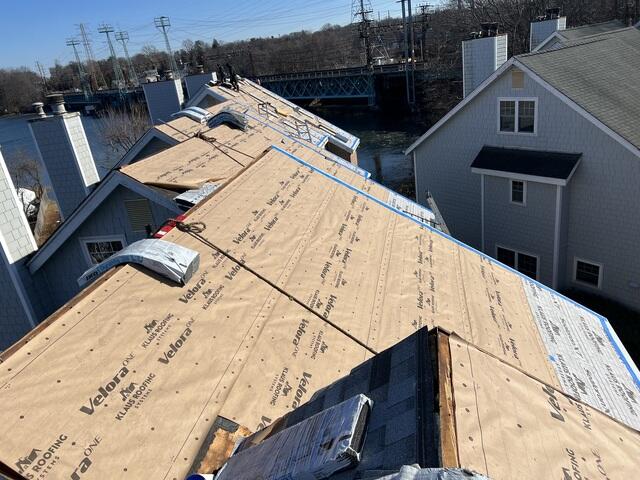
Underlayment Is Applied
If the crew determines that the plywood is up to quality standards, they proceed to apply the underlayment. This is a thin material used to protect the plywood from moisture, which helps prevent issues such as rot, mold, or leaks.
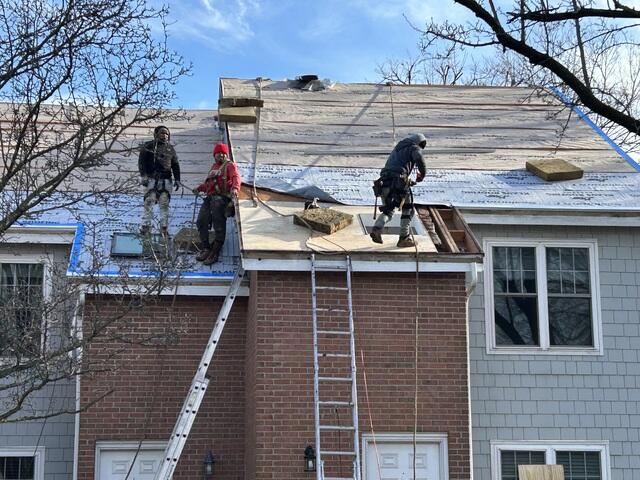
Plywood Around Skylight Is Replaced
One area where the plywood was found deteriorated and in need of replacement was around this skylight. The crew efficiently and expertly cuts and sizes sheets of plywood when necessary to fit around roof objects like skylights, as well as vents, pipes, and other adornments.
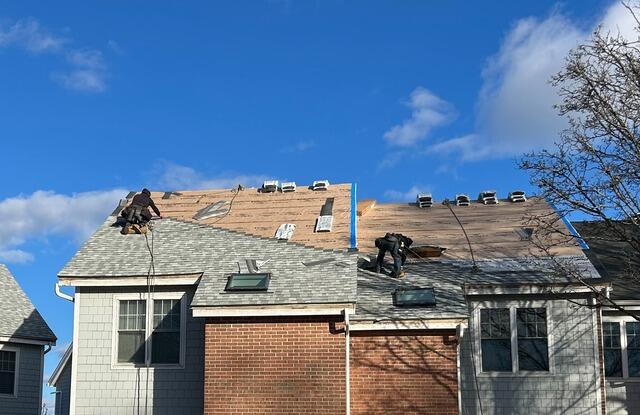
New Shingles Are Installed
After the underlayment is complete, the crew begins installing the new shingles. This homeowner chose our supreme IKO Dynasty shingles in Frostone Gray.
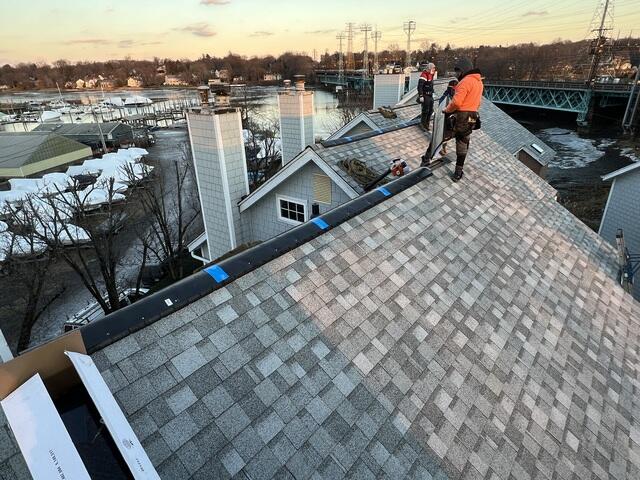
The Ridge Vents Are Installed
One of the last steps is to install a ridge vent at the top of each roof. The ridge vent ensures proper ventilation and airflow through the roof and prevents humid air buildup in the attic, thus helping protect the roof from moisture damage.
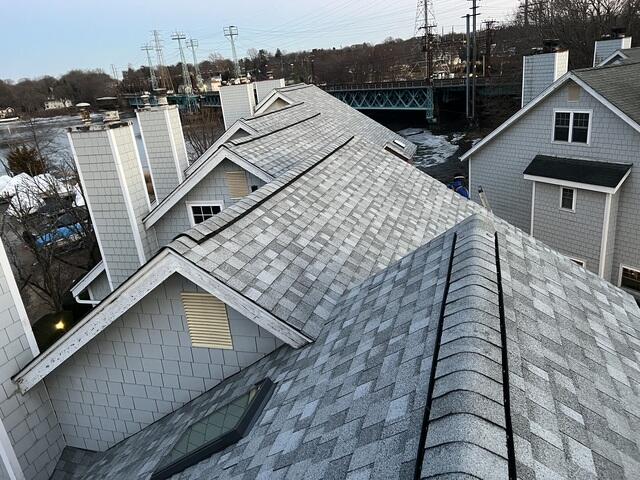
Hip and Ridge Shingles Are Installed
Matching hip and ridge shingles are installed atop the ridge vents, completing this beautiful new roof.
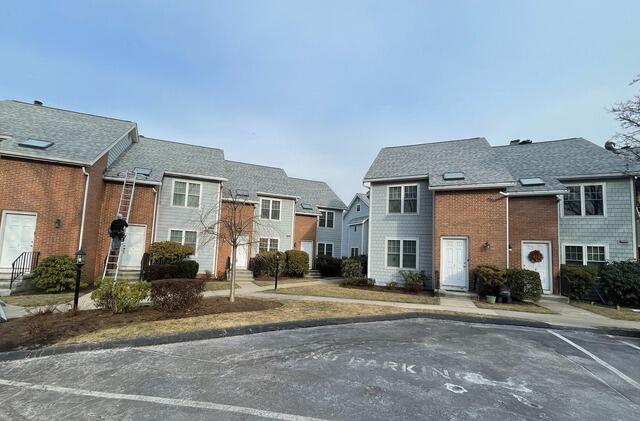
Final Result: Front View
The townhouse roof replacement is finished! In addition to 10 roofs and 17 skylights, these homeowners also opted to install our state-of-the-art Gutter Shutter system. With brand-new roofs and gutters backed by our lifetime warranty, these homeowners are set for years to come.