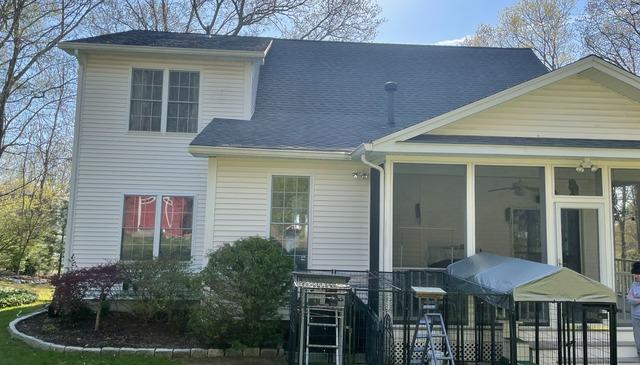
Before
Here the color fade is not very noticable along with the moss mostly due to the sun being directly above in this photo.
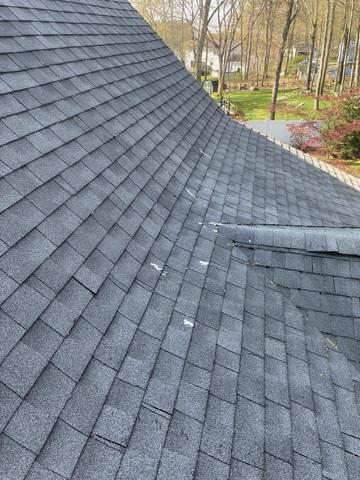
Taking a closer look
In this photo, you can see the damages and growth up close. In the valleys, there is moss growing, and a few patches can be spotted here and there on the roof. Additionally, there are spots on the roof that have a lighter shade, and this is due to color fade. This is normal for older roofs and occurs over time due to the sun's UV rays. The darker streaks are algae, and this tends to eat away the UV protective layer that most shingles have. With this layer gone, the shingles tend to lose their color or fade faster.
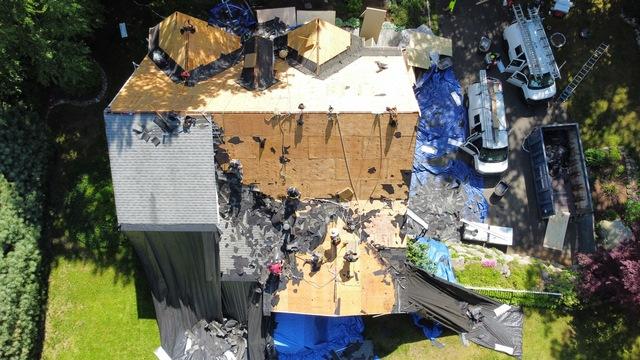
DEMO TIME!
After we got the go ahead to start for the day we jumped right into it. Tearing up the roof is the first step to installing the new roof and it's definitely the most fun. We use the tarps that are attached to the edge of the roof so we can safely slide the materials down and protect the house at the same time. It also keeps the debris off the grass.
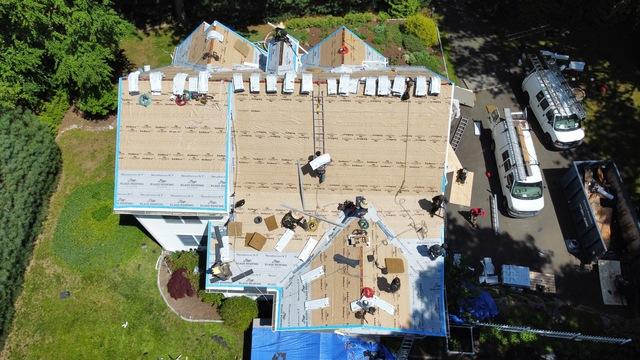
Underlayment and Ice and Water
Our guys are laying down Ice and water and an underlayment. These layers cover the whole house and prevent water from leaking into the home. The Ice and Water is laid down all along the edges, valleys, and ridges.
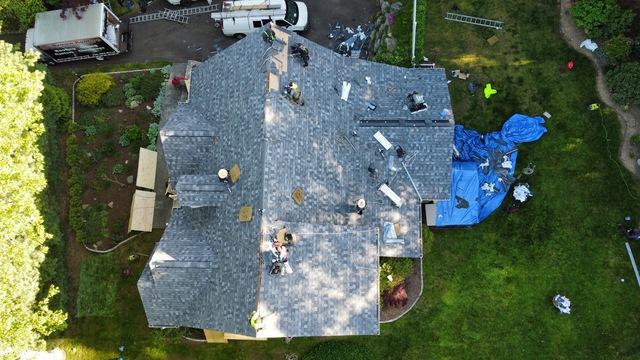
Almost done!
Here our team is finishing up the rest of the shingling at the top of the image and the ridge vents on the right of the image. The ridge vents help regulate heat in the attic and without these vents, improper ventilation becomes an issue and this causes excessive heat build up and this heat can leak back into the home and during warmer months it can increase cooling cost.
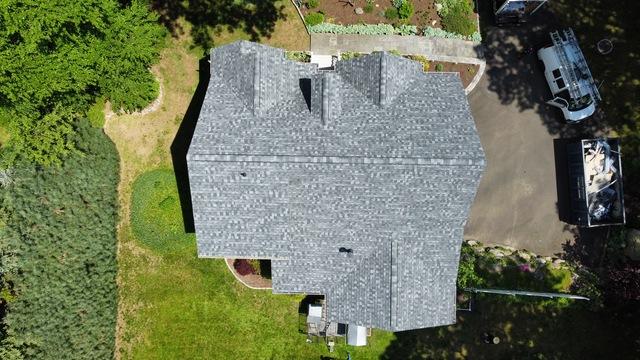
All Done!
Take a look at this beautiful house that now has an amazing roof to match. Our team was in and out in just a day and a half, we worked effectively and efficiently delivering a quality product to the Kiss family, and this roof is guaranteed for the next 50 years.

