
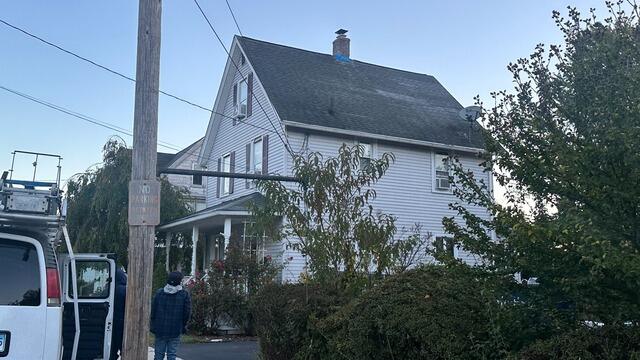
The Roof Before
Take a look at Daniel's roof before the makeover. Even from afar, shingle staining is visible, and the chimney is in serious need of new flashing. Time to get to work!
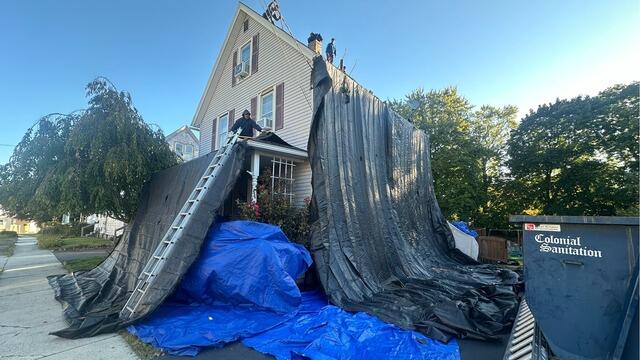
Protective Tarps Are Set Up
Before the roof renovation starts, large, heavy-duty tarps are spread across the property ensure full protection of the house and landscape. These also help make cleanup faster and easier.

The Teardown Begins
With all precautionary measures in place, the crew begins carefully stripping the old shingles from the ridge, working their way down. As you can see, these shingles were heavily warped, discolored, and covered in moss - making this replacement long overdue.

Decking Is Examined & Replaced
Once all the old shingles are removed, the plywood layer underneath, known as the roof decking, is fully exposed. As the structural foundation of the roof, the condition of the decking is critical. The crew carefully inspects every section for signs of damage like rot or mold. Any areas showing damage are promptly removed and replaced with fresh, new plywood.
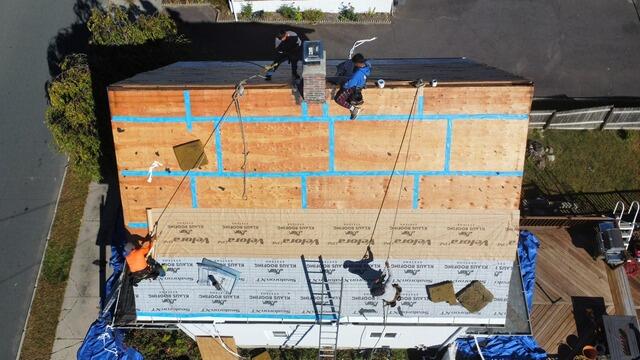
Seams Are Taped & Underlayment Is Installed
The crew further reinforces each sheet of plywood by taping up the seams with heavy-duty all-weather deck tape. Next, underlayment is installed over the entire surface. This is a thin, water-resistant layer of synthetic felt that protects the decking from harsh elements like rain, snow, and ice.
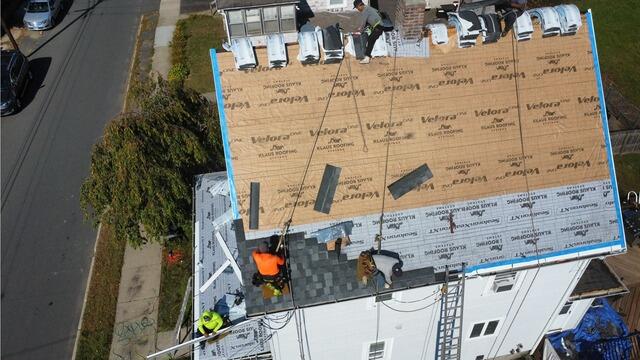
New Shingles Are Installed
Now that the underlayment is completely applied, the crew can start installing the new IKO Dynasty premium-laminated architectural shingles. These heavyweight and high-quality shingles come in a variety of colors, and Daniel has chosen the sleek and sophisticated shade of Summit Gray for his new roof.
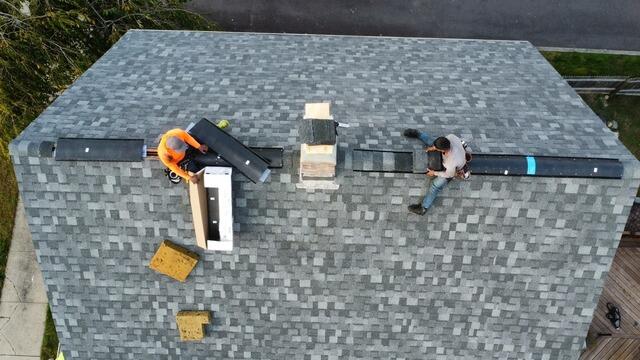
Ridge Vent Is Installed
A ridge vent is installed at the peak of the roof. This vent ensures proper airflow by allowing hot, moist air that rises from the house a way to escape, eliminating damaging condensation buildup.
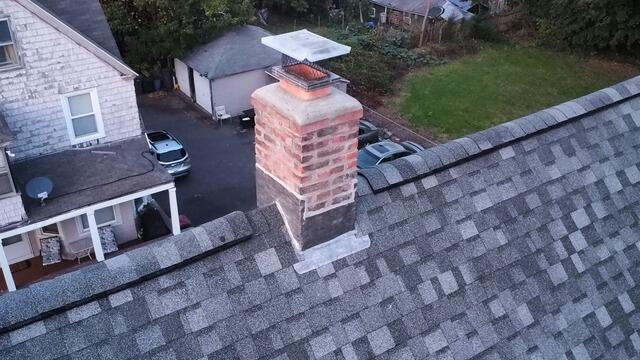
Chimney Gets New Flashing
New flashing made of durable lead is installed around the chimney where it meets the roof. This thin, sturdy barrier ensures that water can't seep through vulnerable joints, preventing leaks and damage.
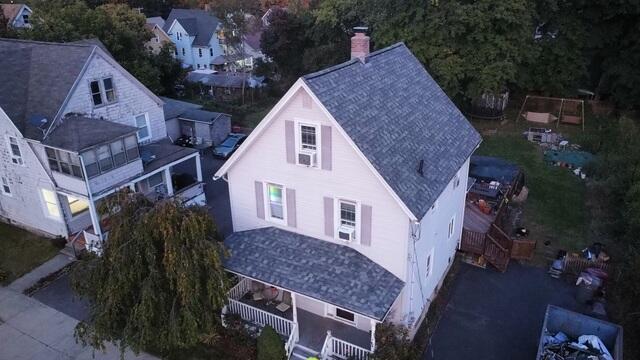
The Roof Is Complete
After a few finishing touches, like installing a ridge cap over the ridge vent and securing flashing around all the pipes, the new roof is officially complete and ready to stand strong for years to come!