
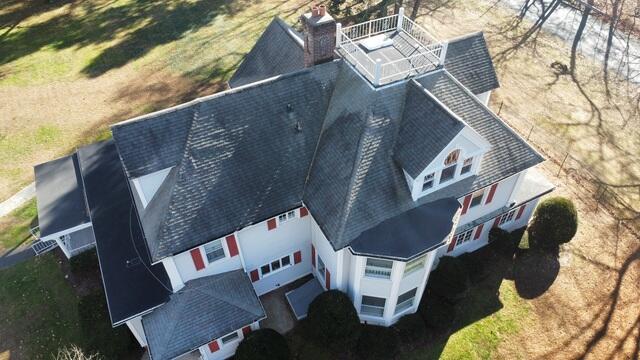
Aerial View: Before Roof Replacement
Large, dark stains on the roof indicate shingle water damage on this three-story home. This damage does more than discoloration - the structural integrity of the entire roof is compromised, which leads to problems like leaks and mold.
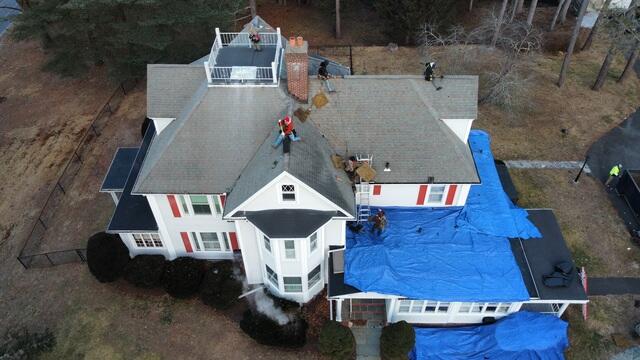
The Teardown Begins
The crew begins removing the old roof by stripping off the shingles. Tarps are laid down to ensure that the house, yard, and other important objects like vehicles are kept safe and protected during the entire replacement process.
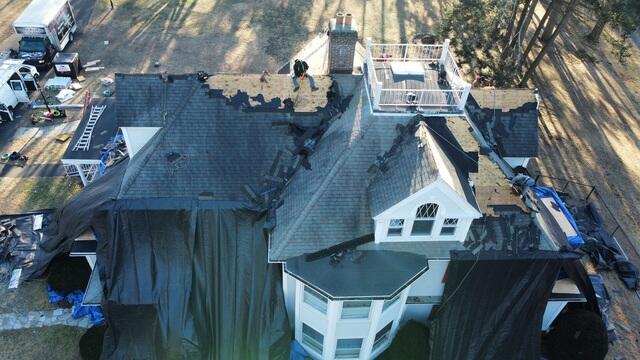
Shingle Stripping Continues
Removing the shingles exposes the plywood underneath. This plywood is also known as decking and is essentially the base of the roof. After the shingles are completely stripped, the crew examines the decking and assesses whether or not any sheets of plywood need to be replaced - whether it be due to rot, decay, mold, or other damage.
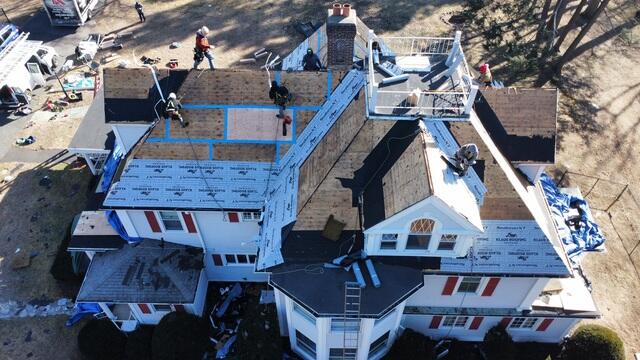
Seams Are Covered & Underlayment Is Applied
After all necessary decking is replaced, all sheets of plywood are taped at the seams with heavy-duty SealoronXT deck tape. Next, the crew lays down a layer of Ice & Water shield. This thin material will keep the decking protected from weather and impervious to water damage.
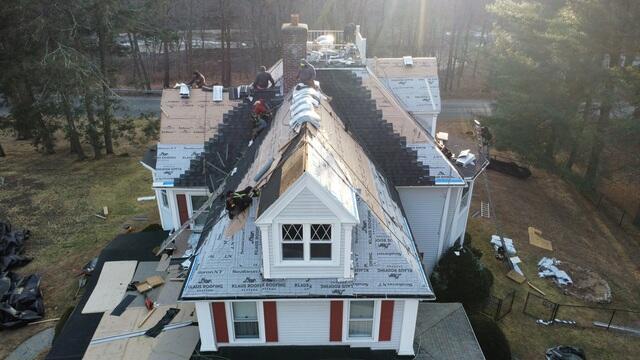
Shingles Are Installed
After the underlayment is applied to the entire roof, the crew starts installing new shingles. These shingles are applied in a particular, staircase pattern, ensuring that the finished look will be uniform and neat.

Shingle Installment Nears Completion
The crew is installing IKO Dynasty shingles in one of our most popular color choices, Granite Black. These heavy-duty shingles provide strong protection from any kind of weather and their premium color quality exudes elegance.
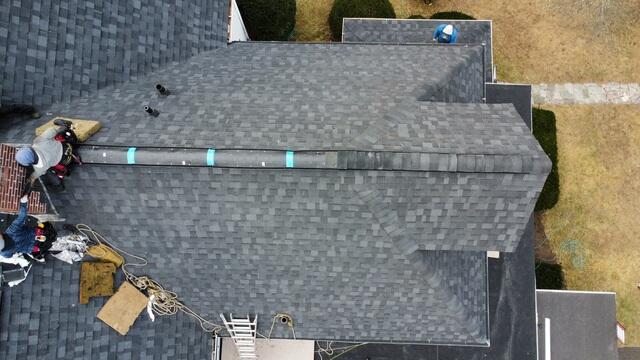
Ridge Vent Installation
After the shingles are on, a ridge vent is installed. A ridge vent helps prevent moisture buildup by allowing hot, humid air that rises from the house to freely escape. Hip and ridge shingles are installed on top of the ridge vent to keep the roof looking seamless.
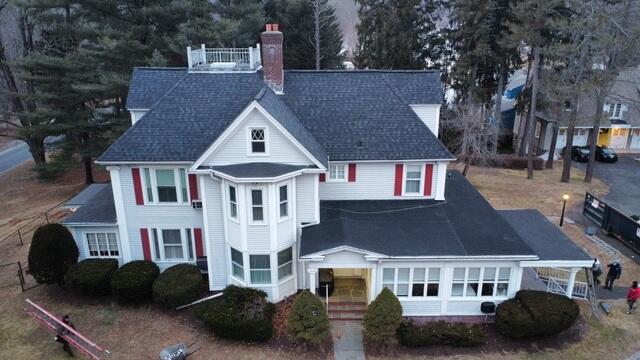
Completed Roof Installation: Front View
With that, this gorgeous three-story home's roof installation is complete! This new roof is sure to keep this homeowner and her family safe and protected for the foreseeable future.