
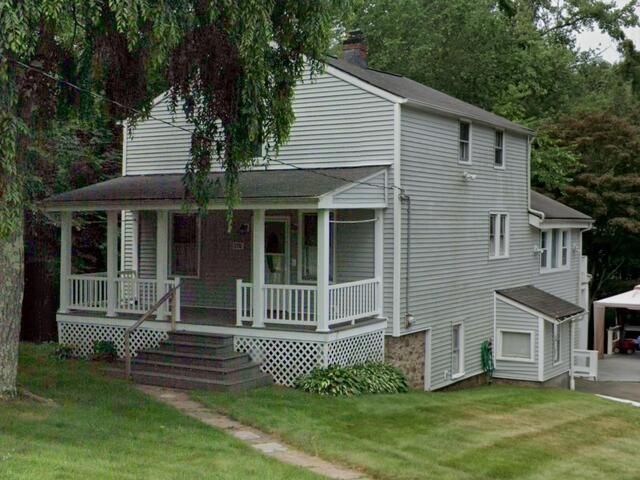
The Roof Before
Here's a look at Anny's roof before the renovation. Click through to see the transformation!
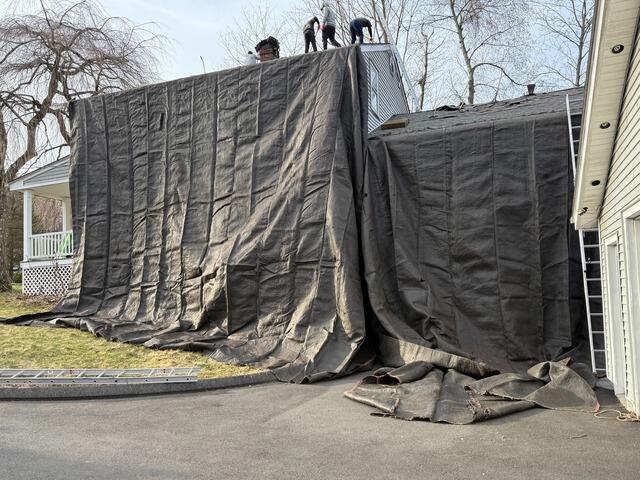
Preparing for the Teardown
Before the teardown starts, the crew hangs up large tarps around the edges of the roof and lays them along the yard to thoroughly protect the homeowner's property from falling debris as well as paving the way for a more efficient cleanup process.
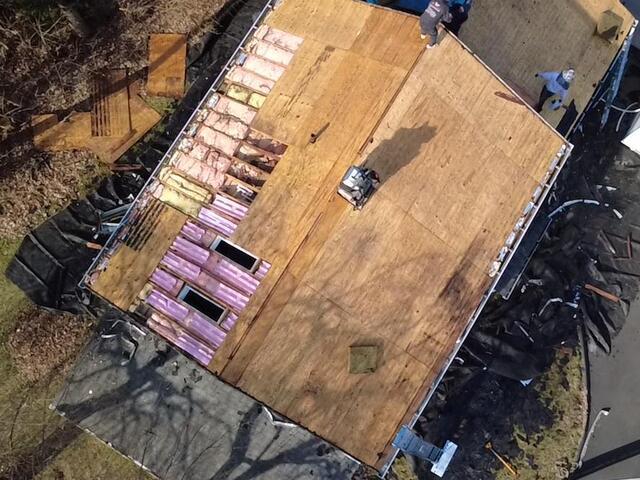
The Sheathing Is Examined
Once all of the old shingles are off, all that's left is the layer of plywood underneath, which is called the roof sheathing. The roof sheathing is the structural foundation of the roof, and it is essential for it to be in tip-top shape before the new shingles are installed. Any areas that show signs of damage, like rot or mold, are removed.
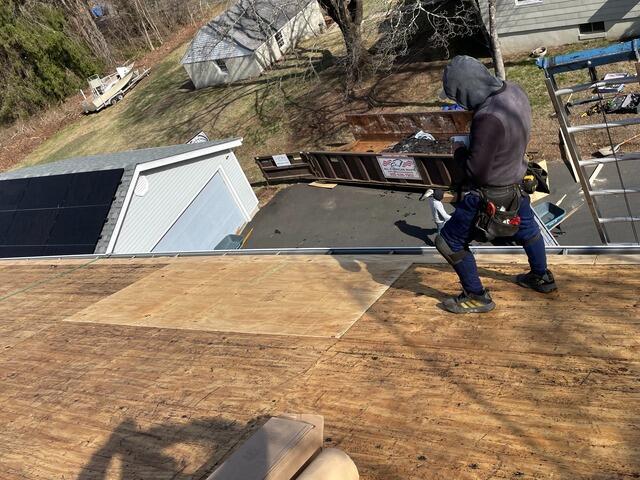
New Plywood Is Installed
Brand-new 1/2" CDX plywood is installed in place of the removed sheathing, ensuring a strong, solid base for the new roof.
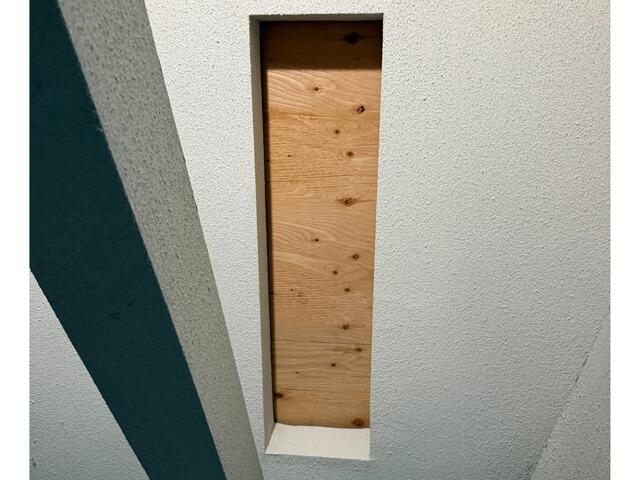
Goodbye Skylight
Anny was interested in removing her skylights for good. No problem! The crew was happy to install sturdy plywood to cover the holes.
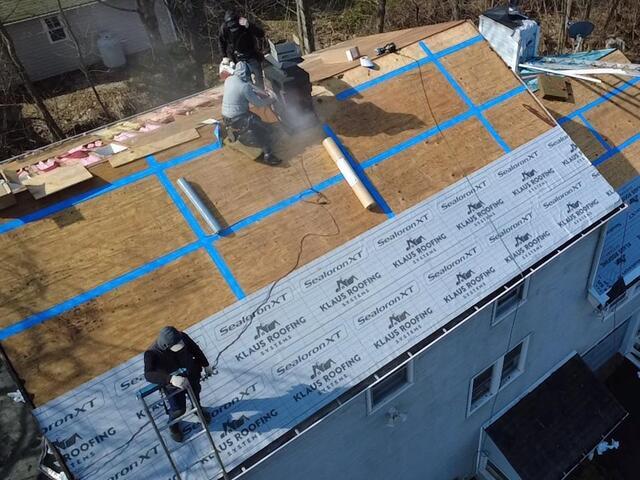
Seams Are Taped & Underlayment Is Installed
Next, the seams of each sheet of plywood in the sheathing are taped at the seams with heavy-duty all-weather deck tape. After that, a layer of underlayment is installed over the entire surface. This thin, waterproof membrane shields the sheathing from harsh elements like rain, wind, snow, or ice.
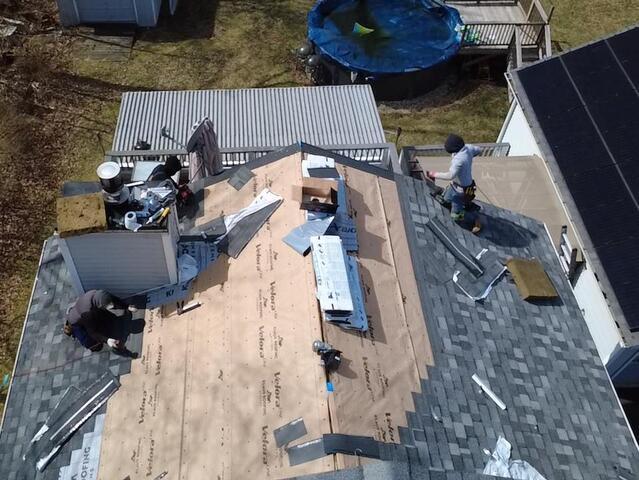
New Shingles Are Installed
7
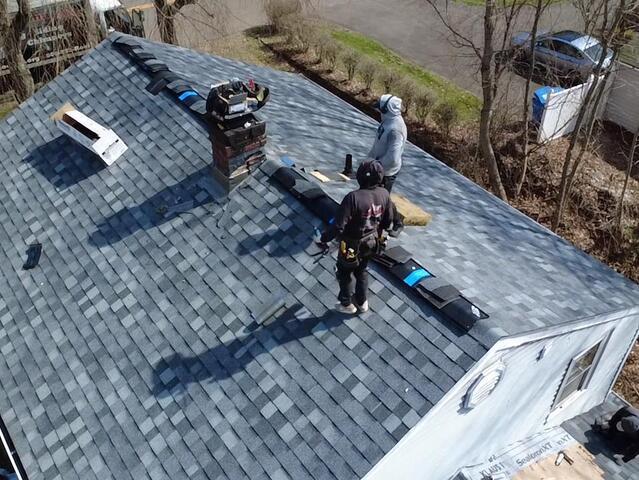
Ridge Vent Is Installed
Along the roof's ridges, a shingle vent is installed to ensure proper ventilation, allowing humid air to escape and preventing moisture buildup that could lead to damage.
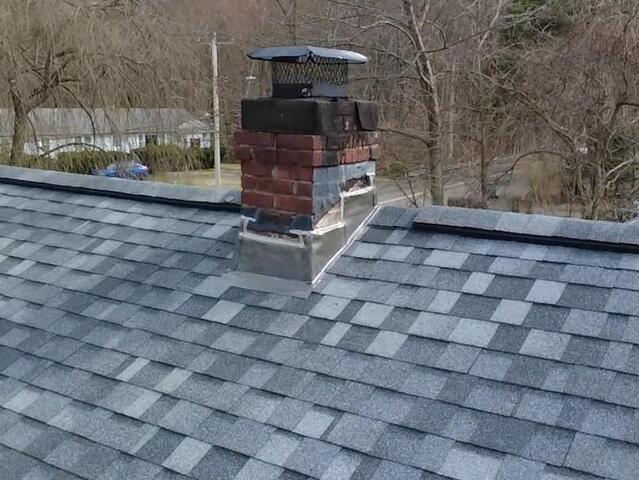
New Flashing on the Chimney
The crew installs metal flashing around the chimney's junction with the roof, forming a barrier that blocks water from leaking in and causing harm.
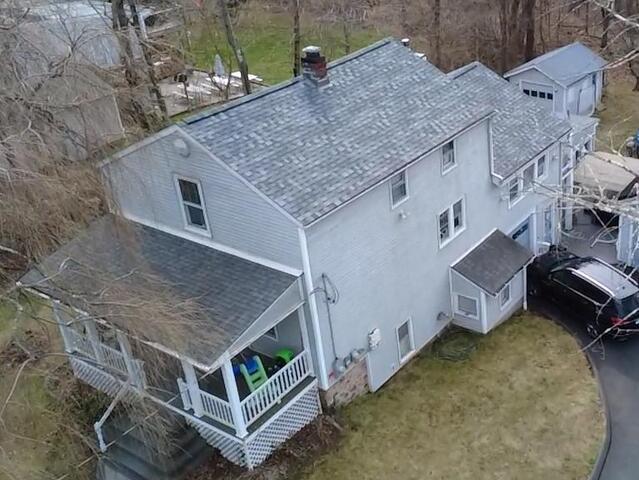
The Roof After
After a few finishing touches, Anny's roof is officially complete, sturdy, and stunning!